Today, I played around with some tiny copper elements—1.5 cm long, 1.5 mm diameter wire pieces. I hammered them on both sides at different angles, giving each a unique shape and texture. The pieces got little holes at their ends, letting me string them together on a wire ring alternating with deep Bordeaux glass beads (2.5 mm in diameter).
The result? A delicate, playful design that I think will make for some fun, dangling earrings.
I should have arranged them differently, with the longest element in the middle but anyway. When I mak the earrings I will do it this way. What do you think?
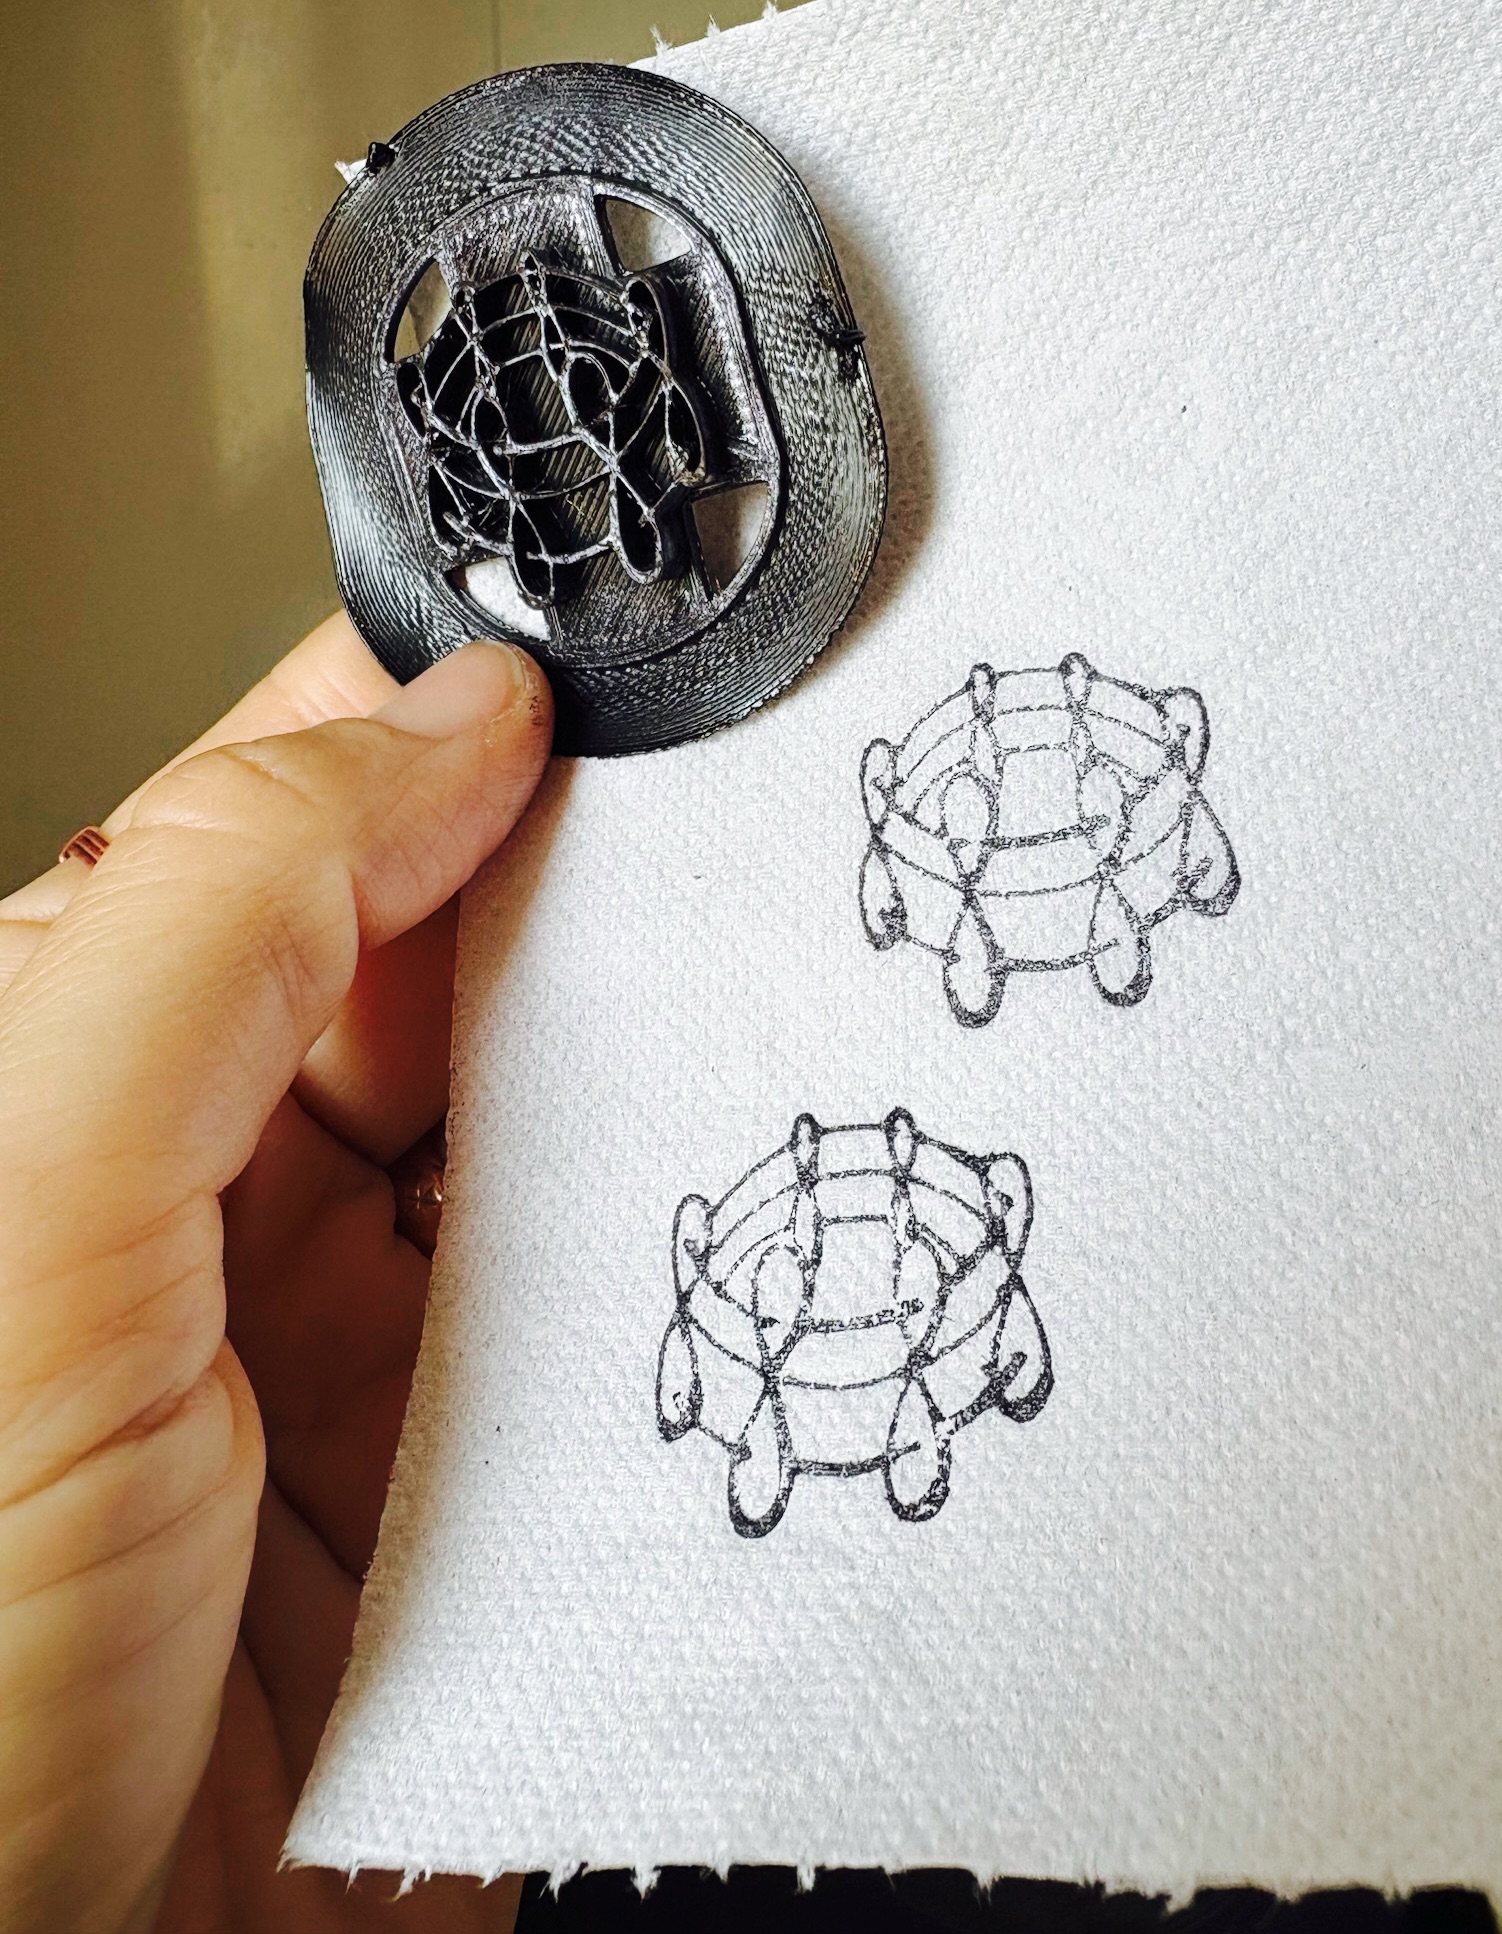
As a pharmacist and artist, I love combining chemistry with creative expression. Recently, I took one of my illustrations—a benzene molecule with its ring and p-atomic orbitals—and transformed it into a functional 3D-printed stamp.
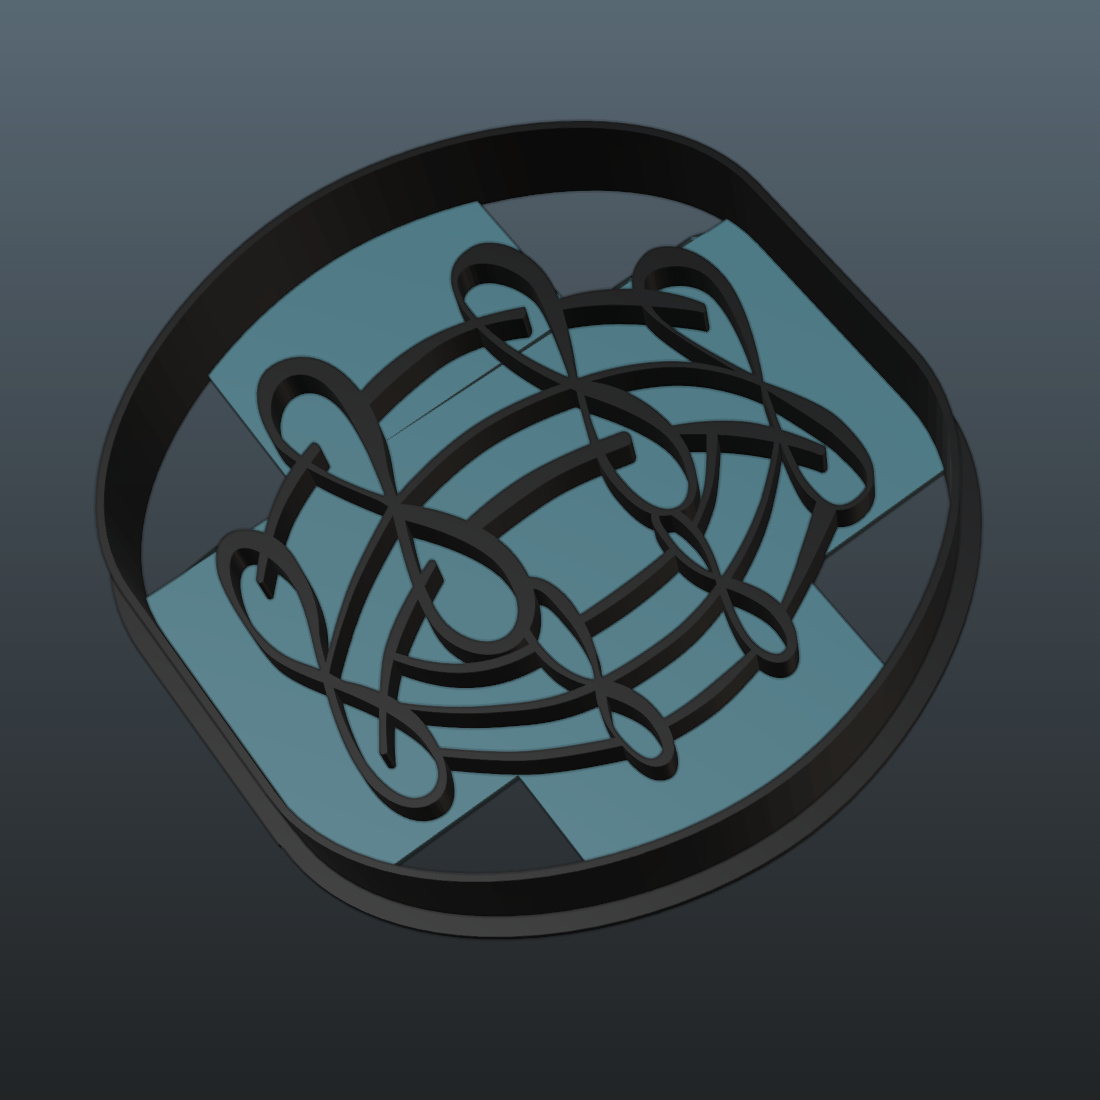
The process started with vectorizing my original drawing, then bringing it into Blender to create a 3D model. Actually, I designed it as a polymer clay cutter, but I thought it should be able to function for a stamp, too. Depends on the material for printing.
The original artwork, art prints are available here.You can see the sketch on the top right side of the page.The stamp 3d model which I designed in Blender
I printed the stamp on my Anycubic Kobra 2 printer using TPU filament, which provided the right flexibility for inking and printing. At least I hoped so.
The 3d printed stamp, not cleaned at all because I was eager to try printing with it
Testing it with different inks, I experimented with various surfaces and unexpectedly found that … hm… toilet paper worked exceptionally well for block printing. The texture and absorbency created crisp, detailed impressions of the molecule, adding an organic feel to the structured chemical design.
The printed images
This project was a fun blend of science, technology, and art – turning a theoretical molecular structure into a tangible, creative tool. It’s a great reminder that inspiration can come from any field, and sometimes, unconventional materials may yield great results!
I’ve been playing around with Procreate’s symmetry tool a lot, and this time, I’m working on a mandala with weird eyes and green botanical elements. I use the watercolor wet and dry brushes by Bardot Brush and I am in love with them. Here’s a sneak peek of the artwork:
The mix of eyes and plants gives it a strange but natural feel. It is almost ready but I’m still trying some things out, fixing stuff. Looking forward to seeing where it goes.
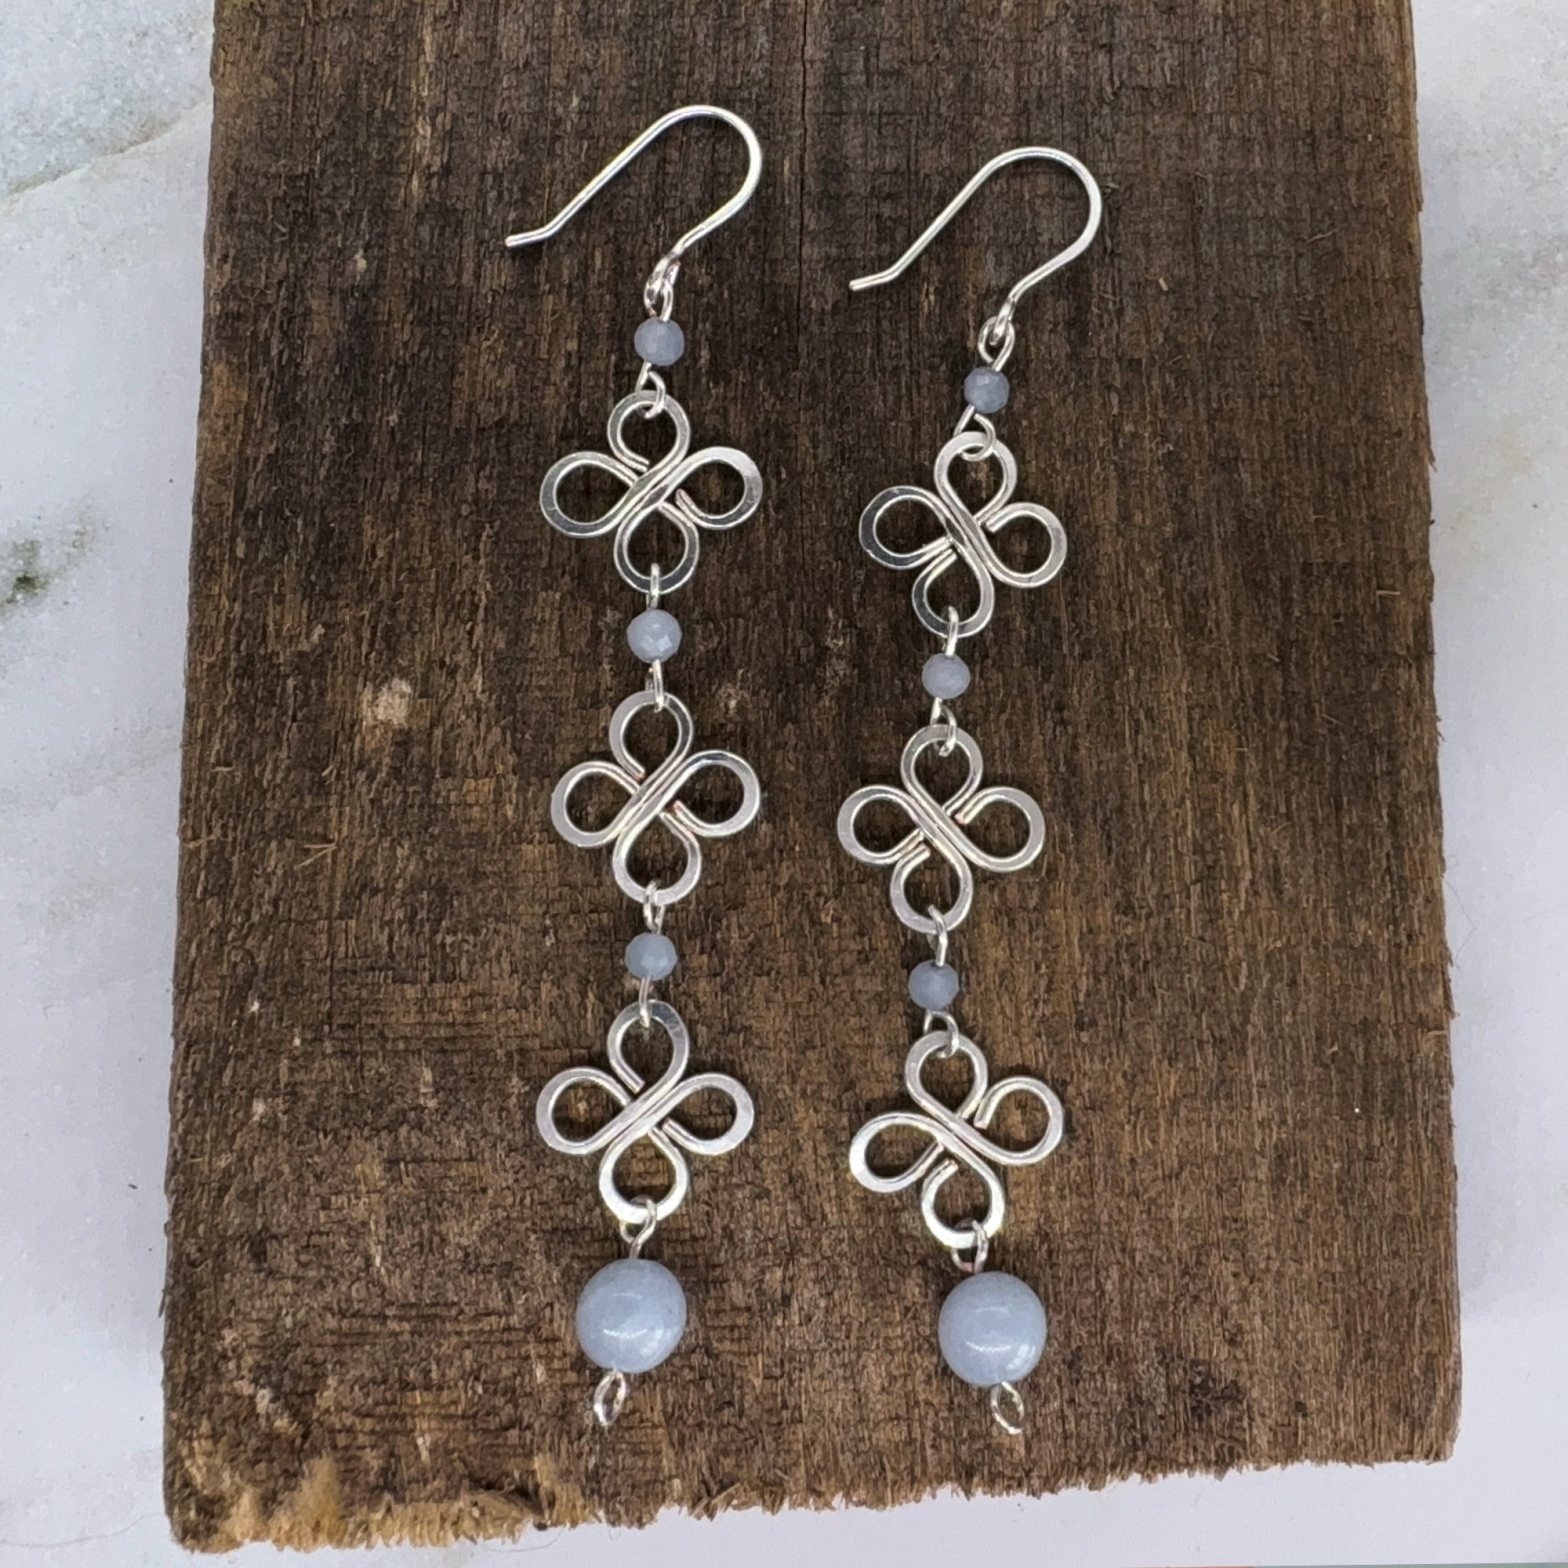
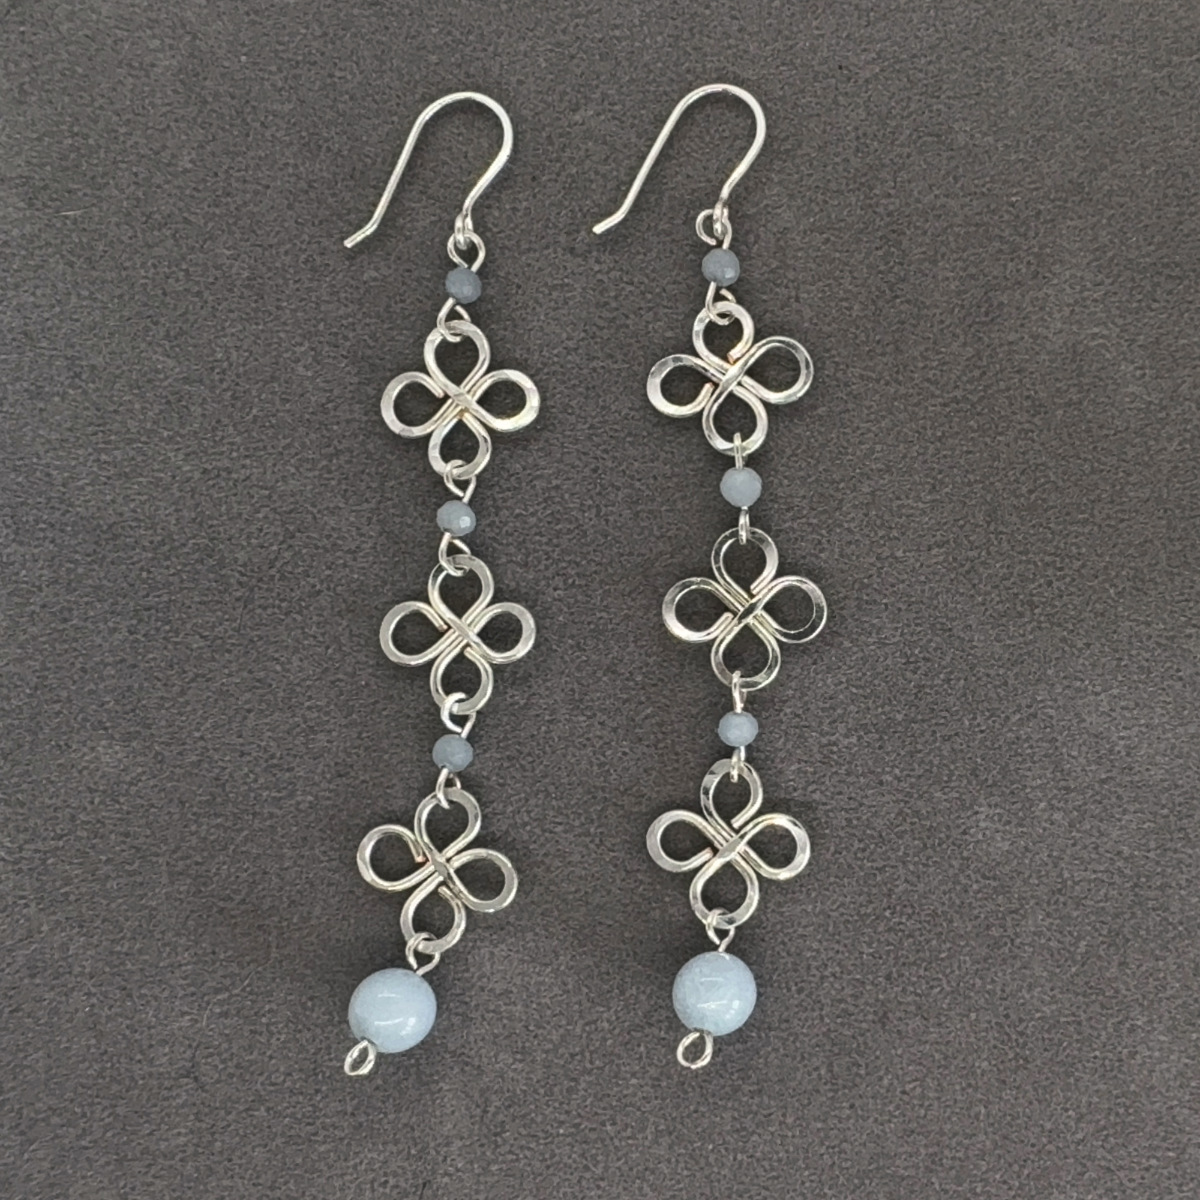
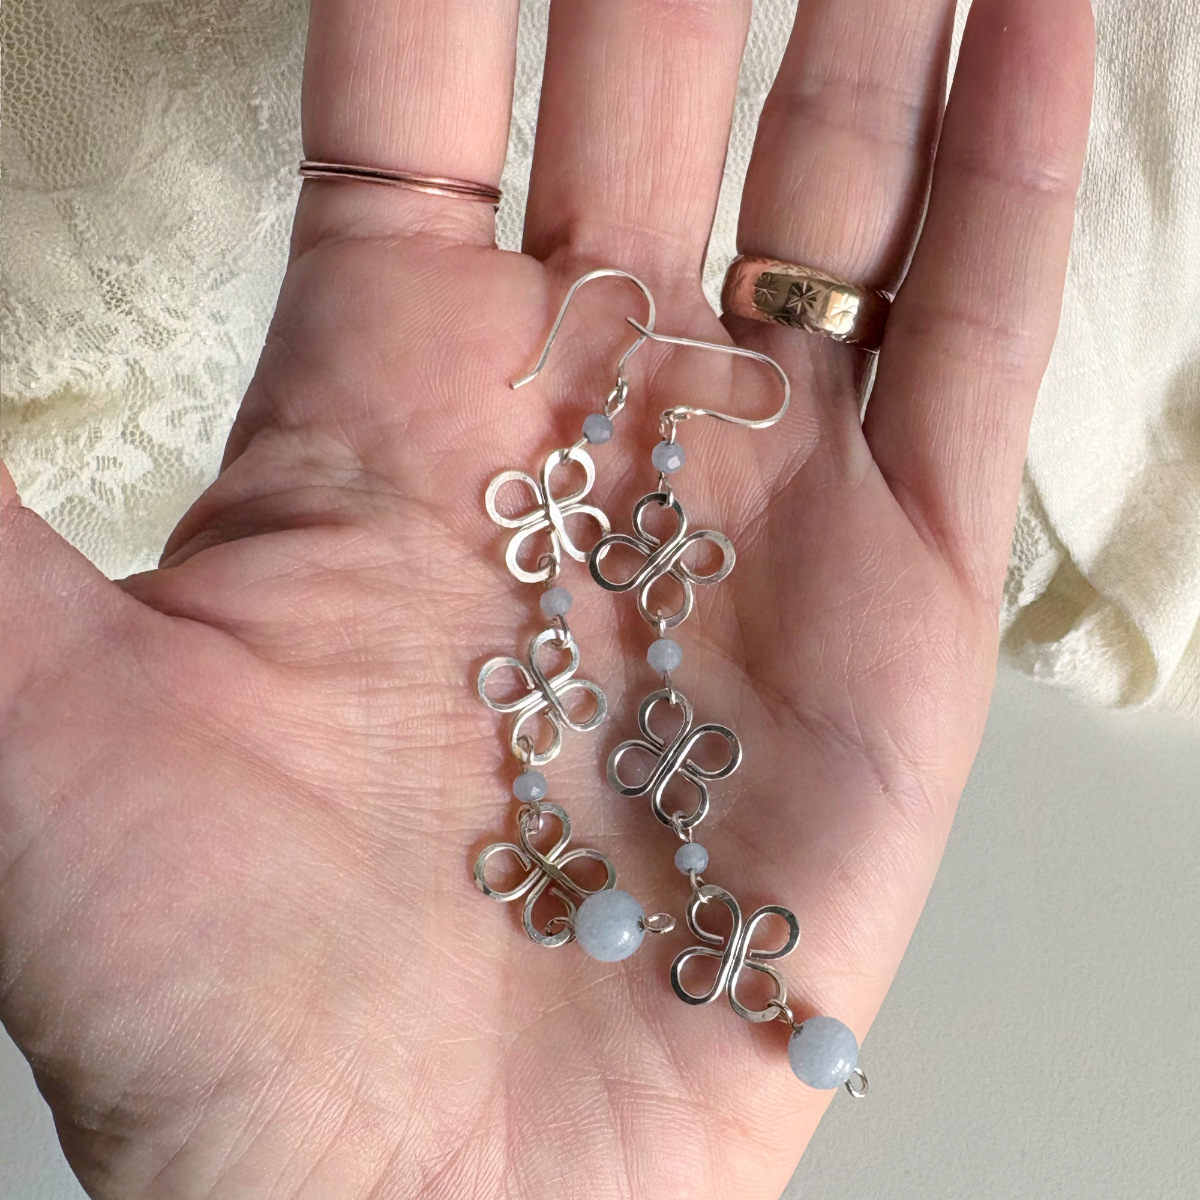
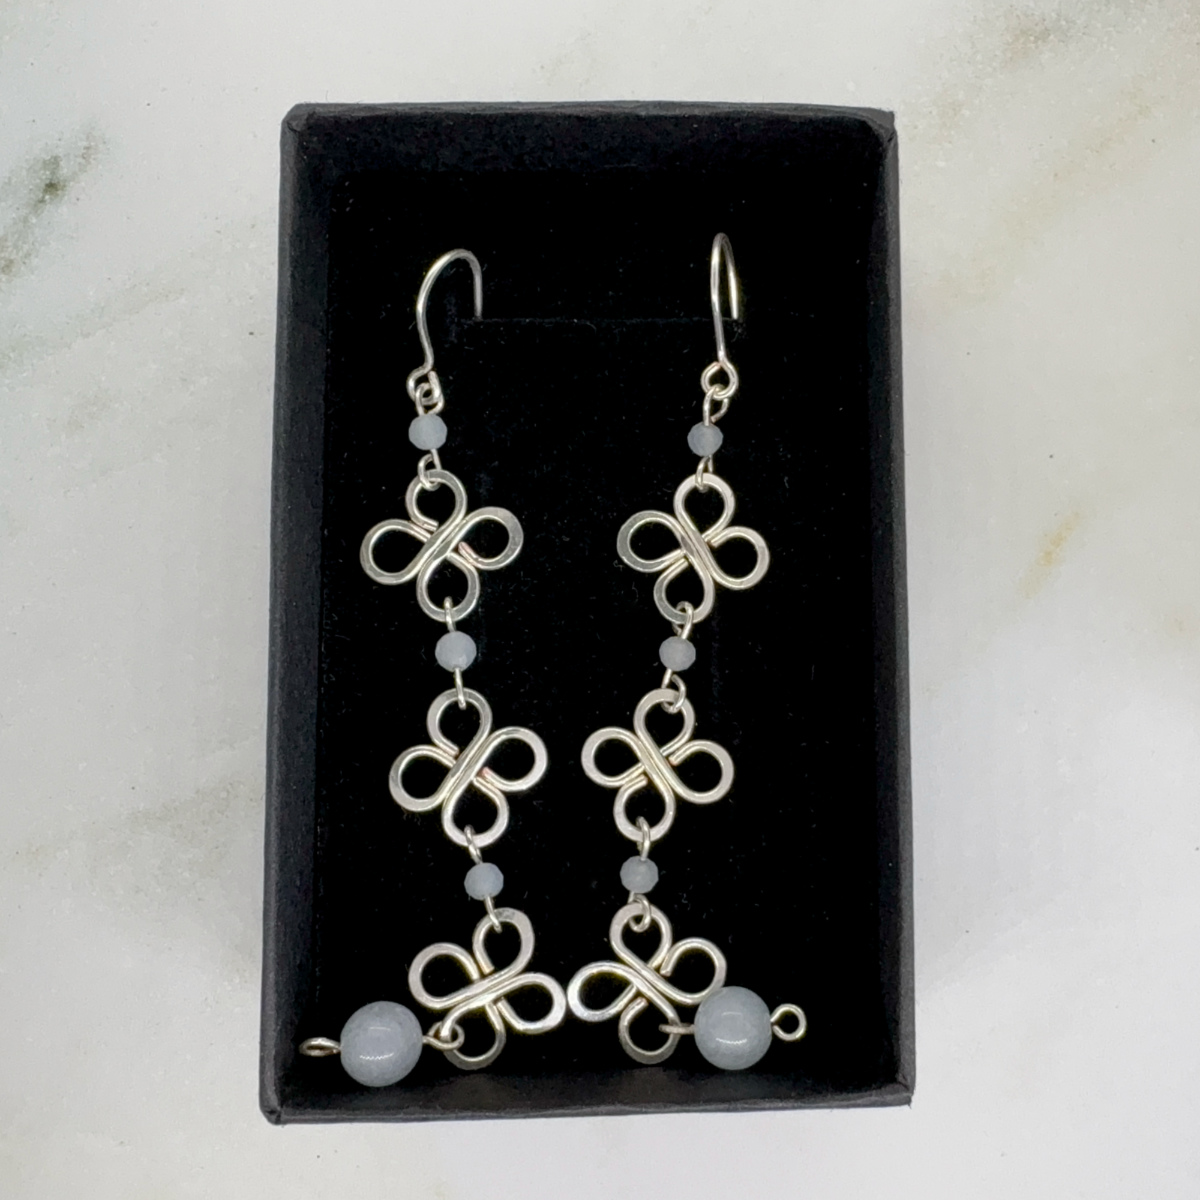
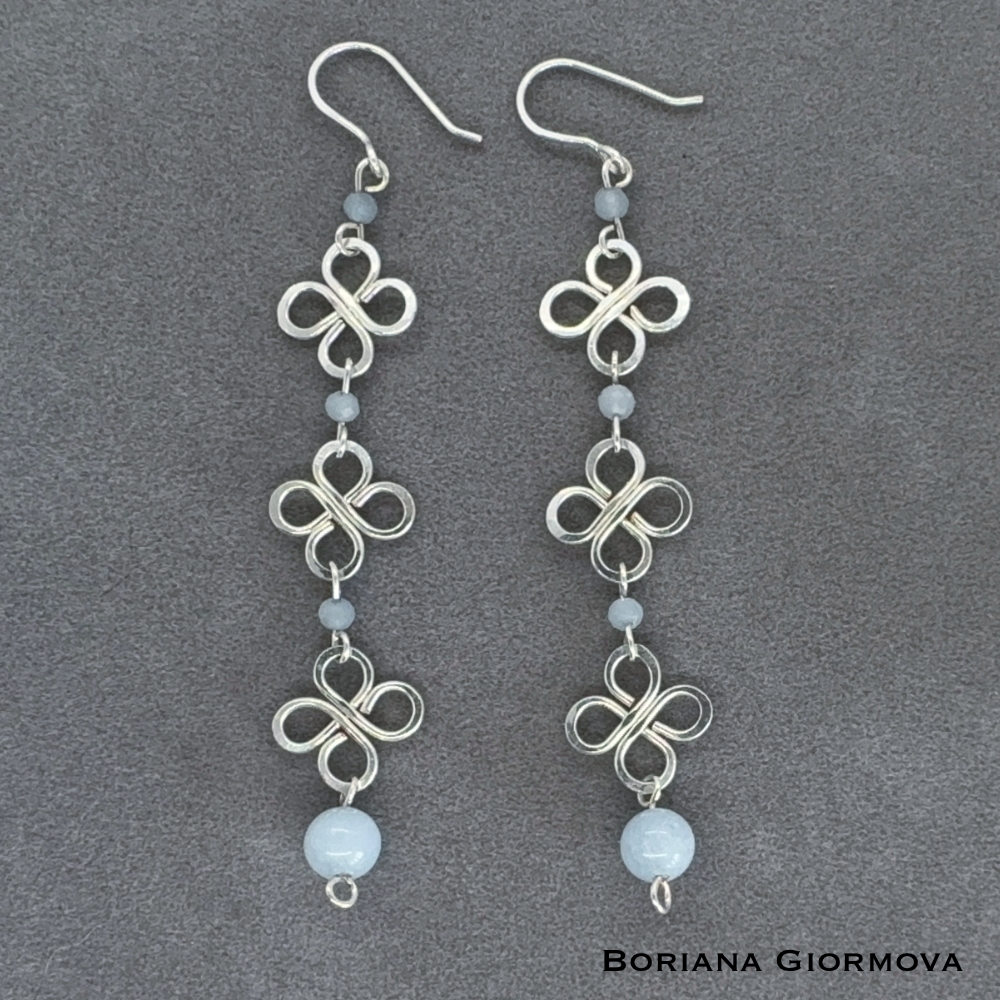
Some designs come quickly, and others take time to find their shape. These long aquamarine earrings were the latter. I wanted them to feel delicate but also have movement—something light yet noticeable.
Each earring has three tiny flowers, each with 3mm faceted aquamarine stones, and at the very end, a 6mm natural aquamarine. The process of shaping and wrapping the silver-plated copper wire was repetitive, and oddly meditative. Made the hooks from silver plated wire, too.
They turned out a little longer than I first imagined, but I like that about them. They’re subtle, but they catch the light in a way that makes them feel alive.
Maybe they’ll find a home with someone who appreciates small details, soft colors, and jewelry that feels like a quiet moment rather than a statement.
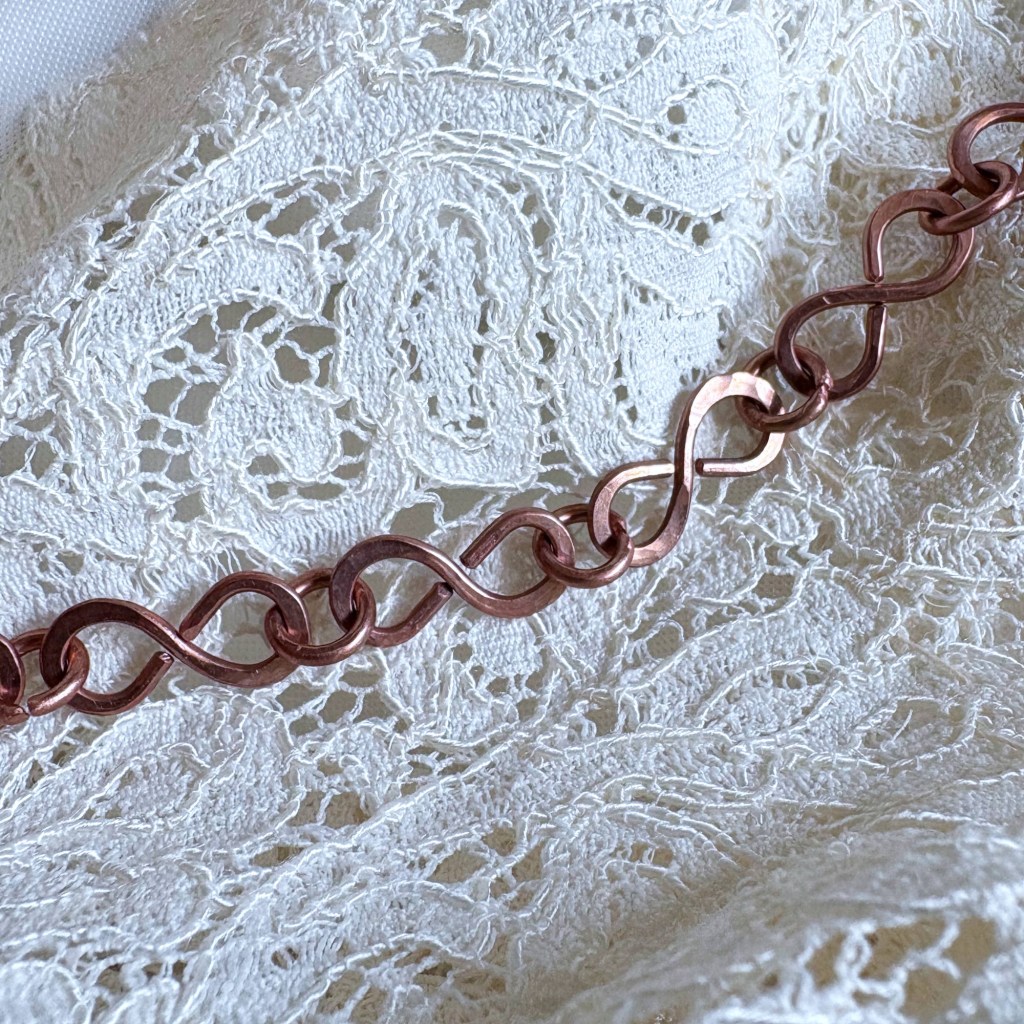
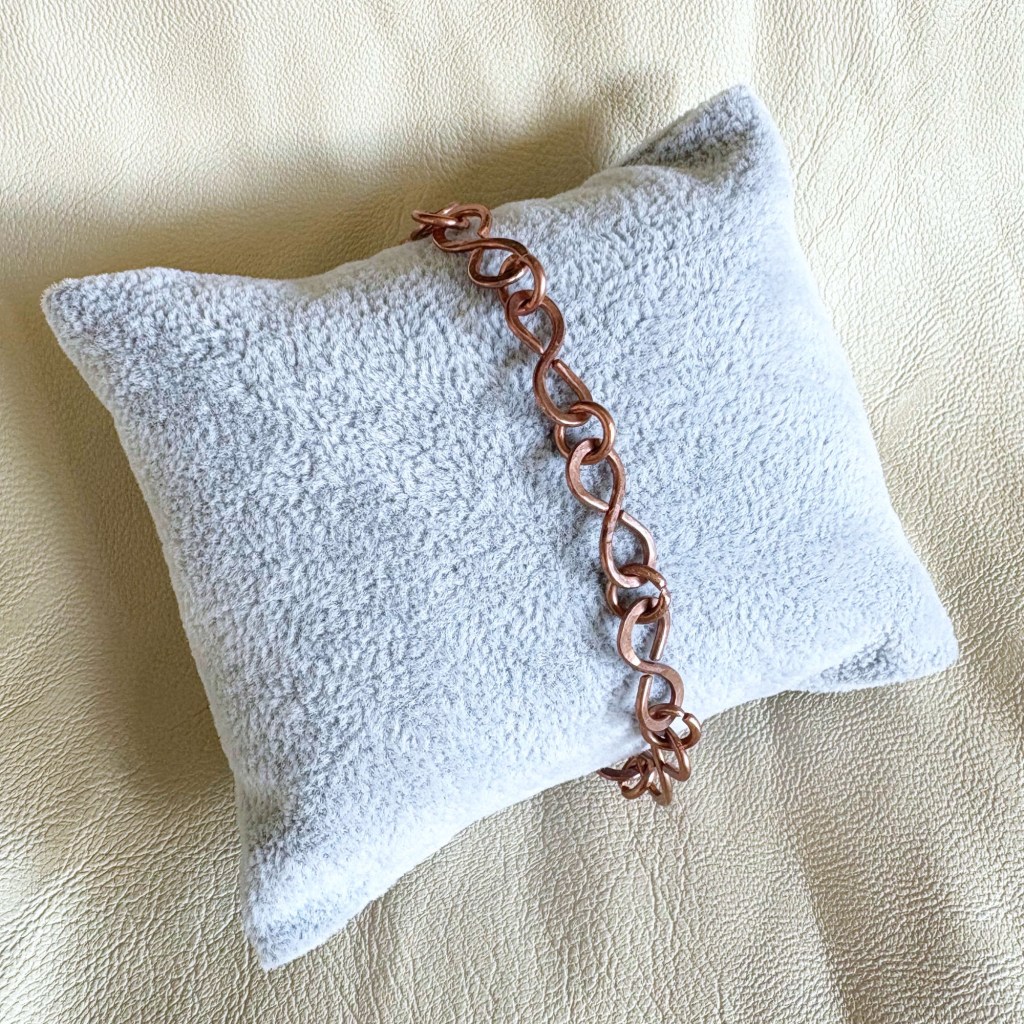
There’s something special about handmade jewelry—the time, care, and craftsmanship behind each piece make it more than just an accessory. It tells a story, carries a meaning, and often becomes something deeply personal. That’s exactly how I feel about this handcrafted copper infinity bracelet—a simple yet elegant piece that blends symbolism and artistry.
Crafting the Bracelet
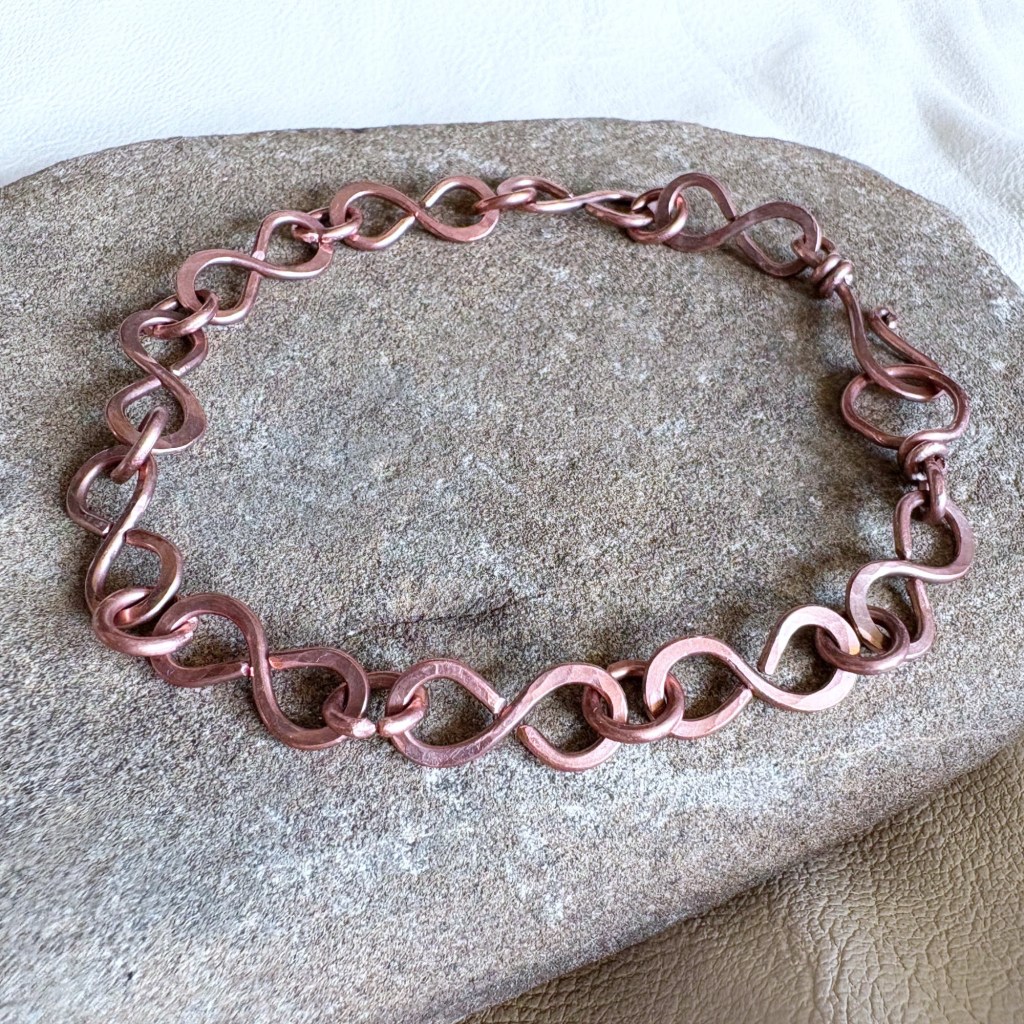
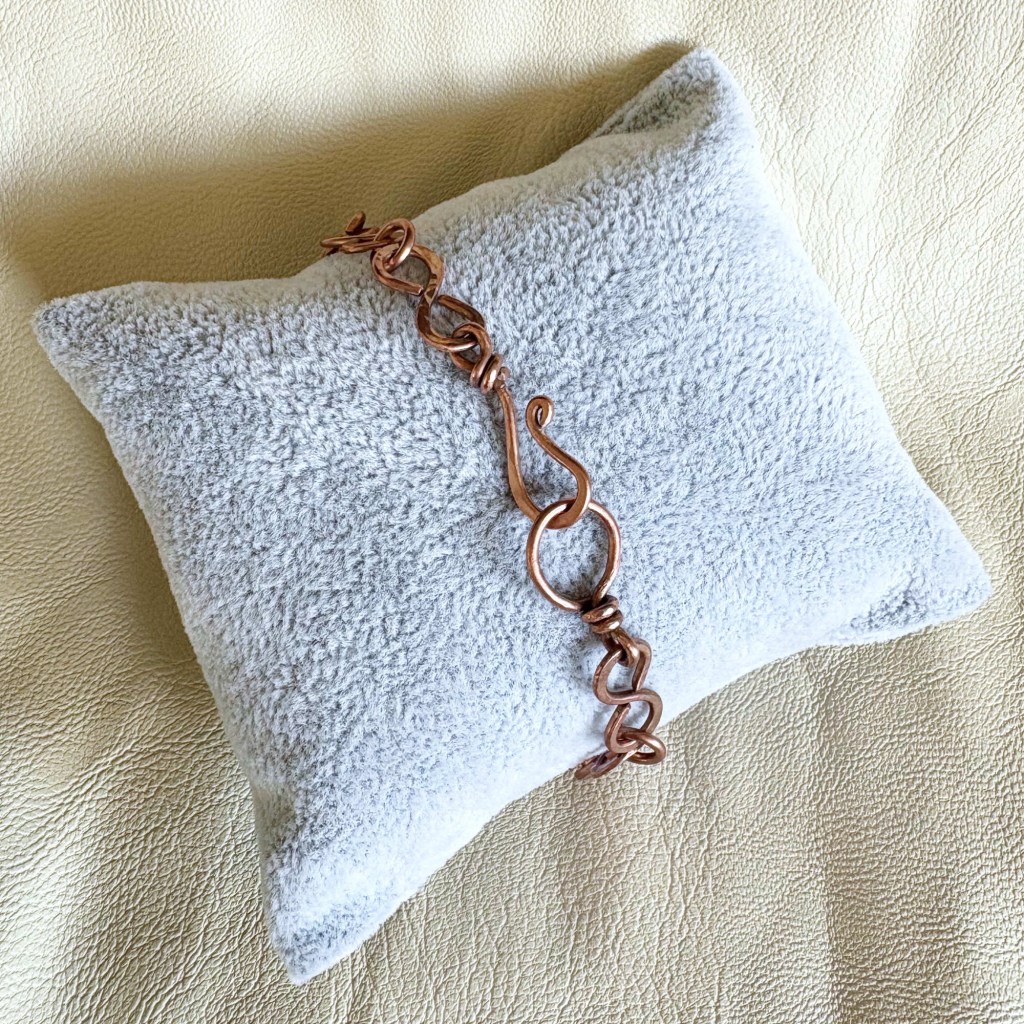
Each bracelet begins with 1.5mm pure copper wire, which is measured, cut, and carefully shaped into links. Every link is then hammered by hand, creating a textured finish that enhances its rustic charm. These links are connected using copper jump rings made from the same wire, ensuring both strength and flexibility. The bracelet is secured with a hammered copper hook clasp, shaped and forged for durability and ease of wear.
The hammering process is more than just aesthetics—it strengthens the metal, giving it a solid yet lightweight feel. Each strike of the hammer adds character, making every bracelet unique. This, along with the relatively thick copper wire I use, makes the bracelet very sturdy. After assembling, the piece is slightly patented, then polished and protected with Renaissance wax to highlight the natural glow of copper before being packaged with care.
A Bracelet for Everyone
One thing I love about this piece is its unisex appeal. It’s neither too bold nor too delicate, making it a great fit for both men and women. Whether worn alone or layered with other bracelets, it carries a sense of subtle elegance that works for everyday wear.
The Meaning of Infinity
The infinity symbol has long been associated with eternity, connection, and endless possibilities. It can represent love, friendship, or a personal journey — whatever meaning resonates with the wearer. That’s what makes it such a thoughtful and meaningful gift.
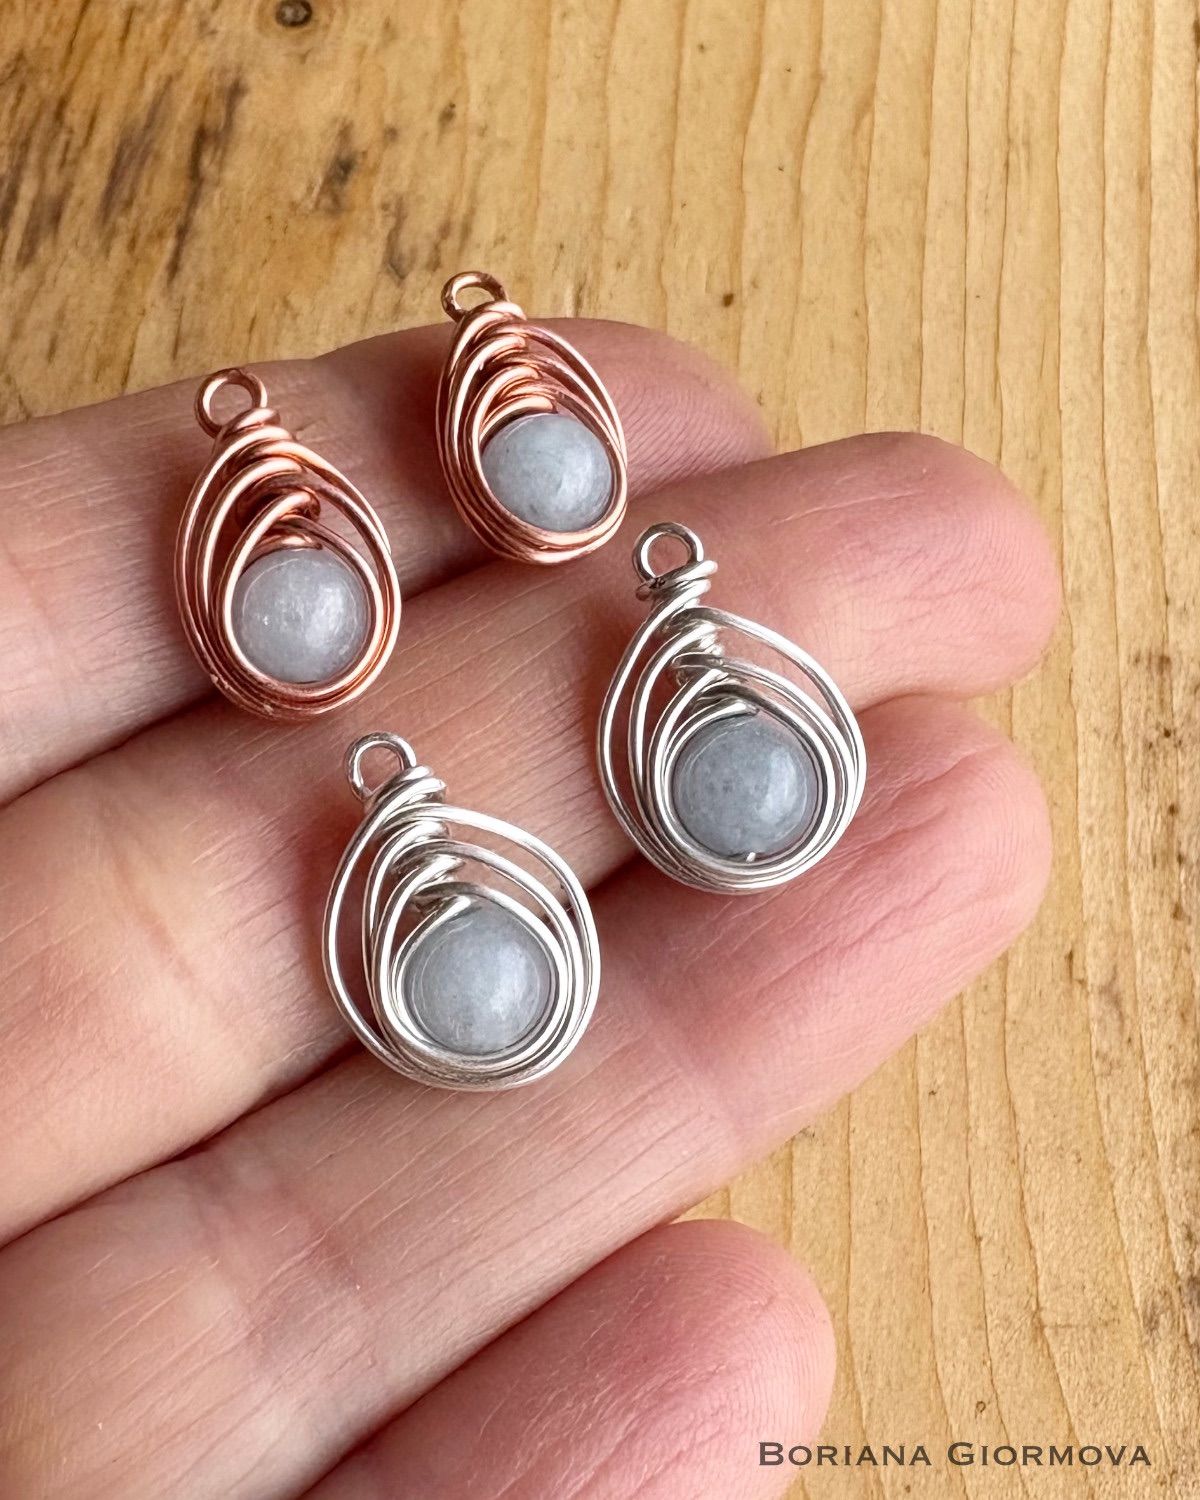
I’ve been learning to wire wrap, and my latest attempt is the herringbone style. It’s a beautiful, flowing technique that frames a stone in delicate wire loops. For this project, I wrapped three natural aquamarine stones—two with copper wire and two with silver-plated copper wire. Used 22 gauge (0.8 mm) wire for both.
Copper was my first attempt, and I found it very forgiving. The wire was soft and easy to manipulate, making the wrapping process smooth. Then I tried the silver-plated copper, and wow—what a difference! The added hardness made the wrapping feel more unruly, and I struggled a bit to get it to flow as nicely. Still, I love how both metals bring out different qualities in the aquamarine.
I’m not sure which I prefer. The warm glow of copper? Or the bright, crisp look of silver? I might even turn them into earrings! What do you think? Let me know which you like best.
I am learning the technique from this wonderful tutorial. If you’re into wire wrapping, I highly recommend giving it a try!
I didn’t set out to make something special. I had seen these simple flower shapes a couple of times and I wanted to try to make them. It turned out to be fun!
The Materials: Imperfect, Yet Beautiful
I chose 6mm natural aquamarine stones. How did I decide to use them? As it is February now, I wondered what was the birthstone of March and I found it was aquamarine. I didn’t even know how it looked. I loved it. The stones I used have a wonderful milky shade of blue , somehow a quiet, calming presence.
I also found that aquamarine is often associated with the sea, clarity, and peace. I love how each stone is slightly different—some clearer, some with tiny inclusions like little frozen waves. That’s the beauty of working with natural materials: they remind you that perfection isn’t uniformity but character.
The wire I used is silver-plated copper, a material has the beauty of silver but is way more affordable. I shape and wrap each piece by hand, embracing the organic imperfections that come with handmade work. Even the ear wires are made from scratch, ensuring that every element belongs together.
The Design: Light and Subtle
I wanted these earrings to feel light, both physically and visually. They’re small and delicate, meant to complement rather than overpower. I imagined them being worn daily—something that becomes familiar, almost second nature, like a favorite sweater or a well-loved book.
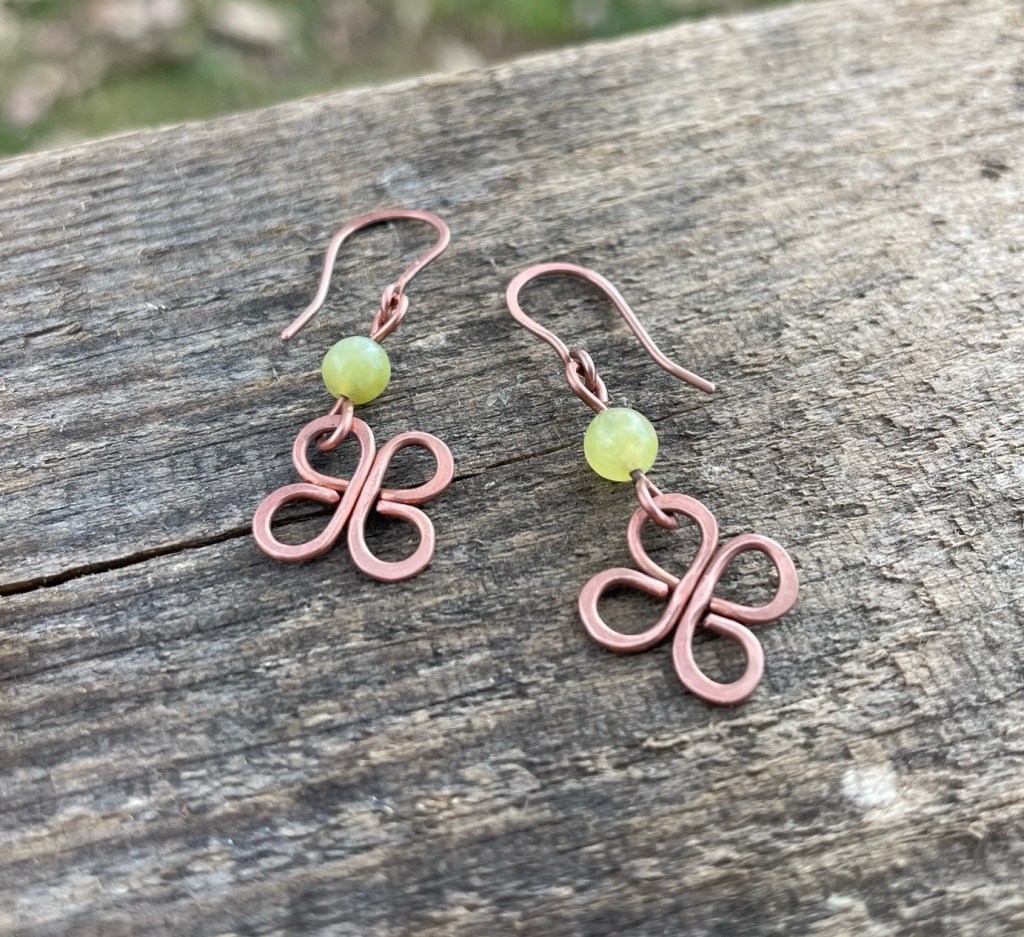
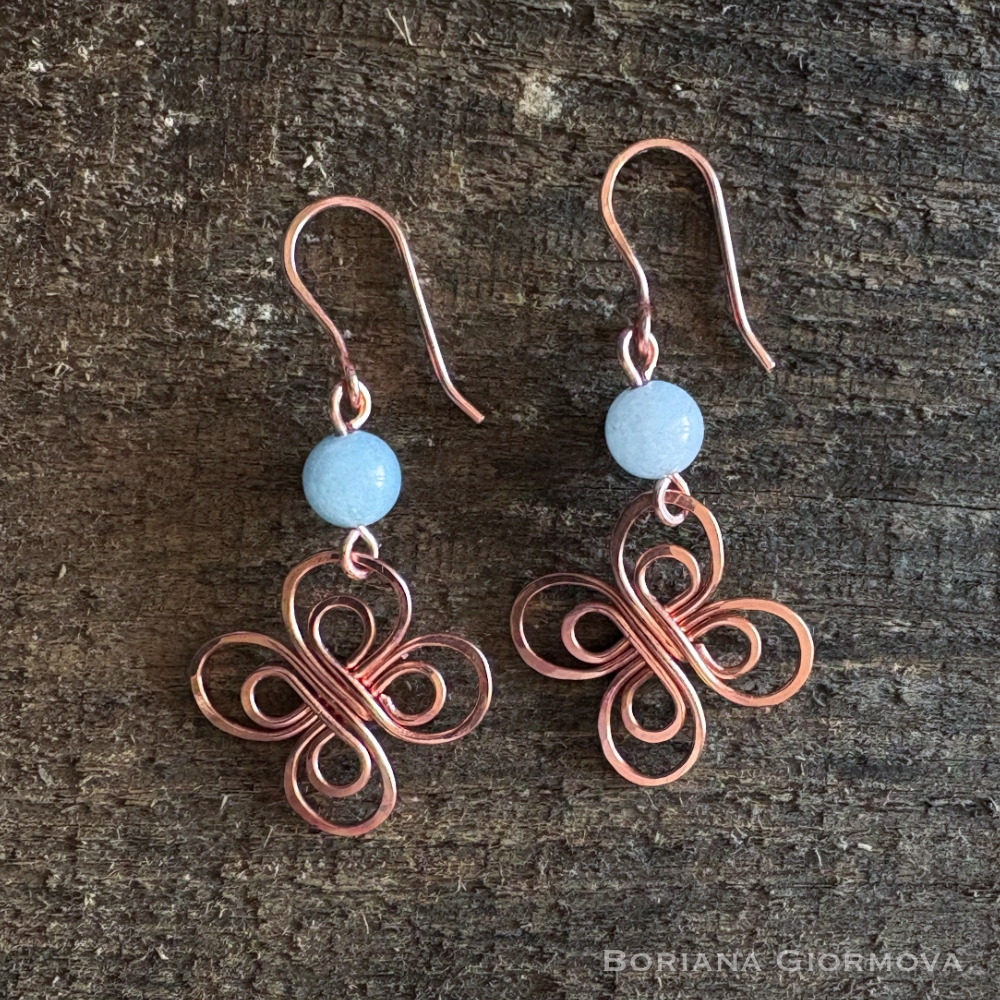
I actually made a pair of the earrings from copper wire for myself, with 4 mm jadeite stones. I varnished them for the copper to be the most protected and I now take them off only when I shower. They’re so comfortable that I even sleep with them. Here they are:
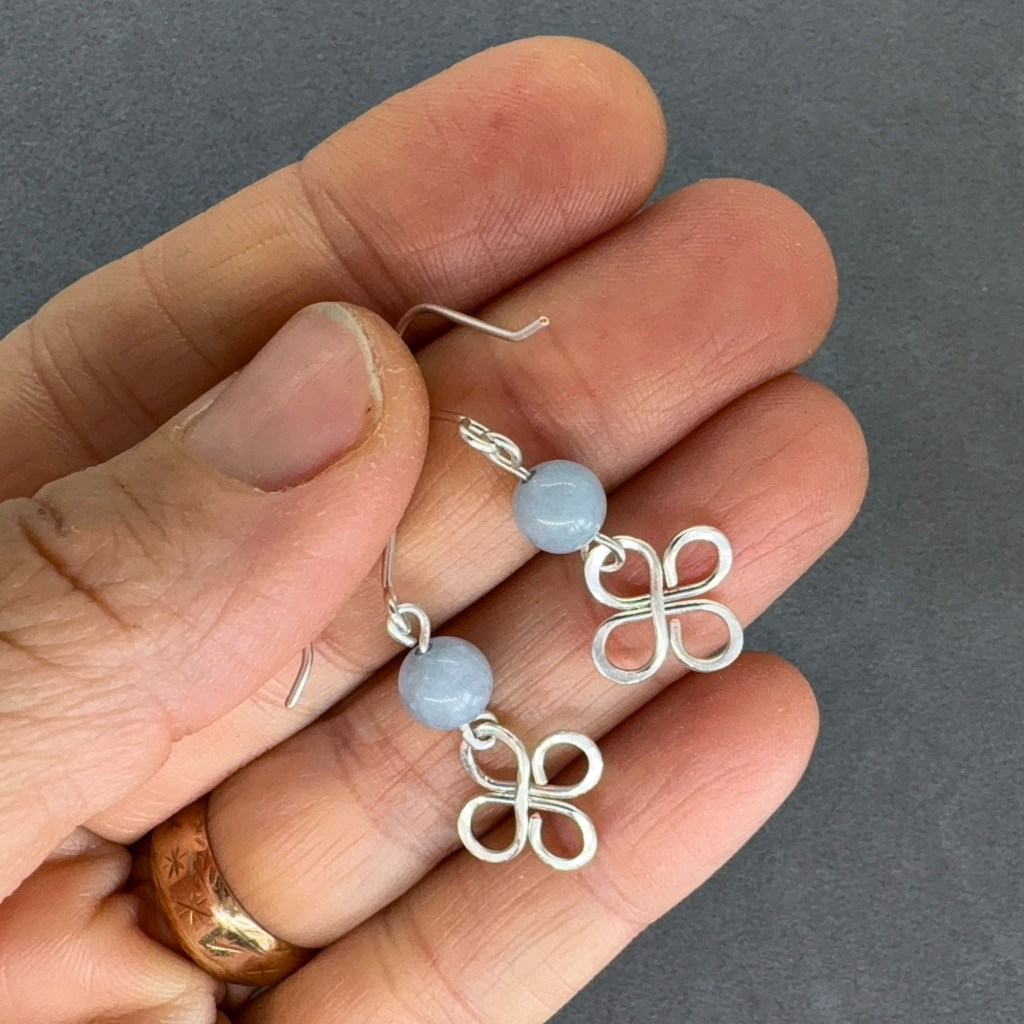
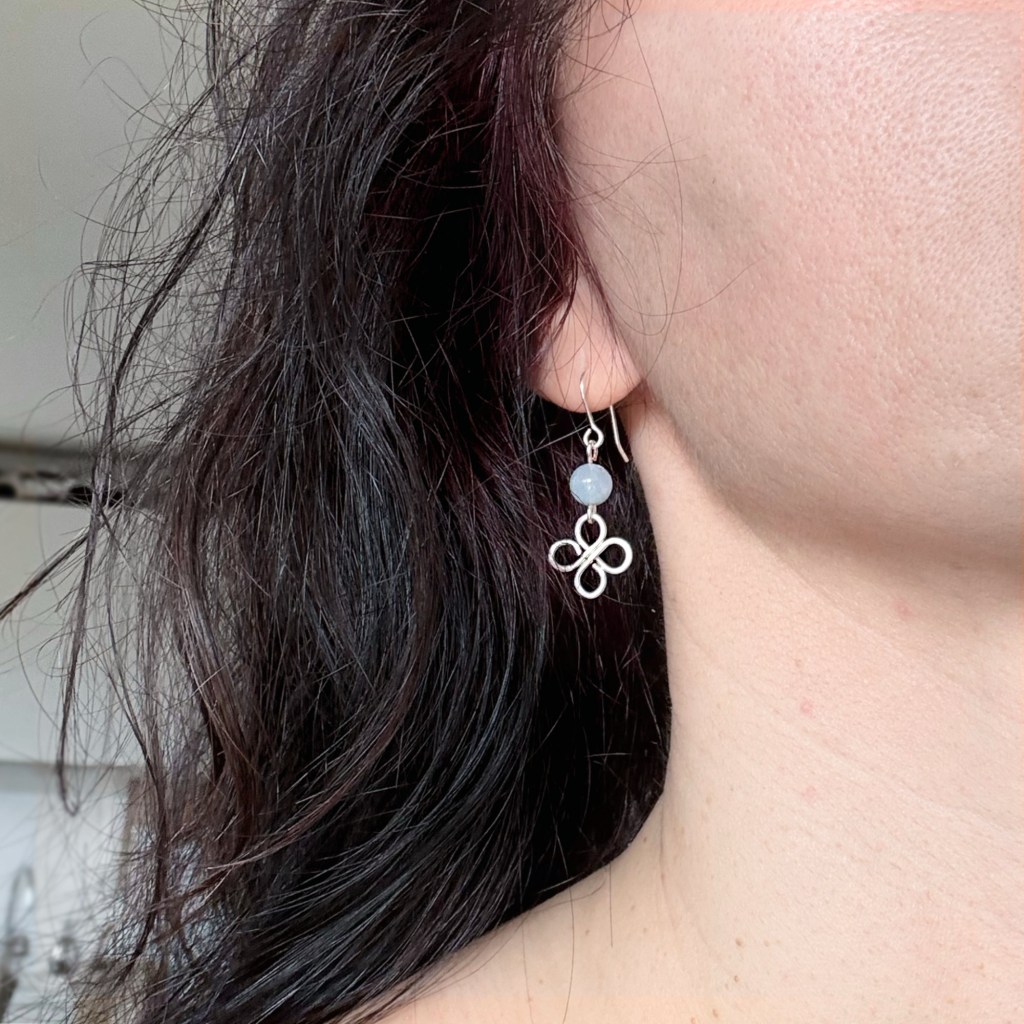
Now let’s return to the silver plated ones. I took more photos so I will share them for you to see them from different angles.
Who Are These Earrings For?
I suppose for someone like me. Maybe for someone who loves small, intricate things. Maybe for someone who appreciates handmade work with all its quirks. Or maybe just for someone who sees them and feels a quiet connection—because in the end, jewelry is deeply personal.
I’m always honored when people choose to wear something I’ve made. It’s a strange and beautiful feeling to know that a piece of wire and stone, shaped by my hands, will become part of someone else’s life.
If you do end up with these earrings, I hope they bring you the same joy they brought me while making them.
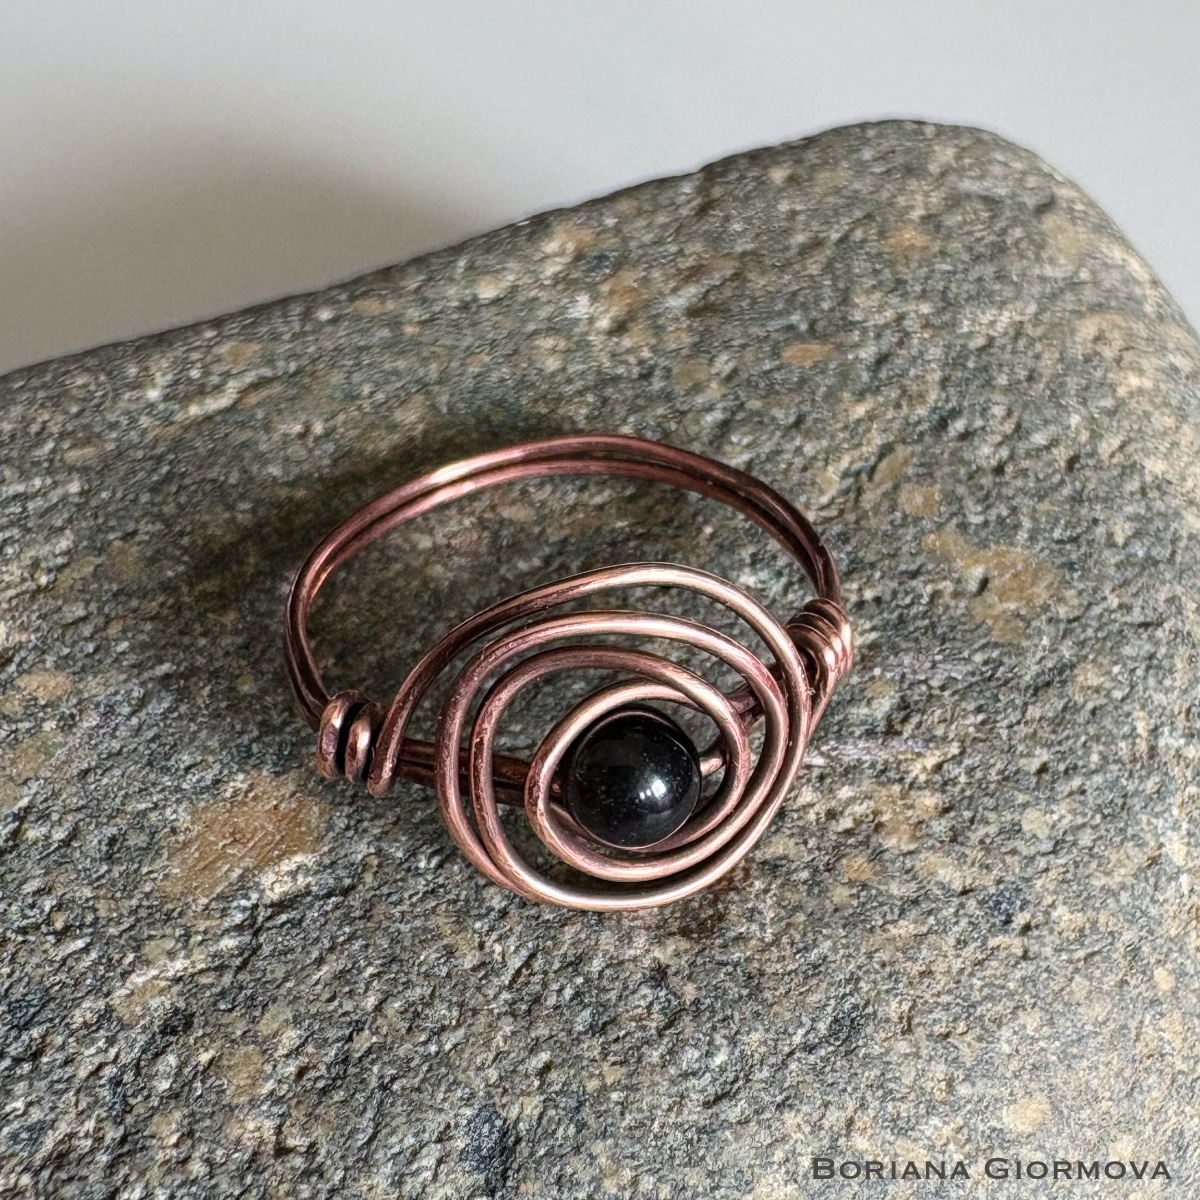
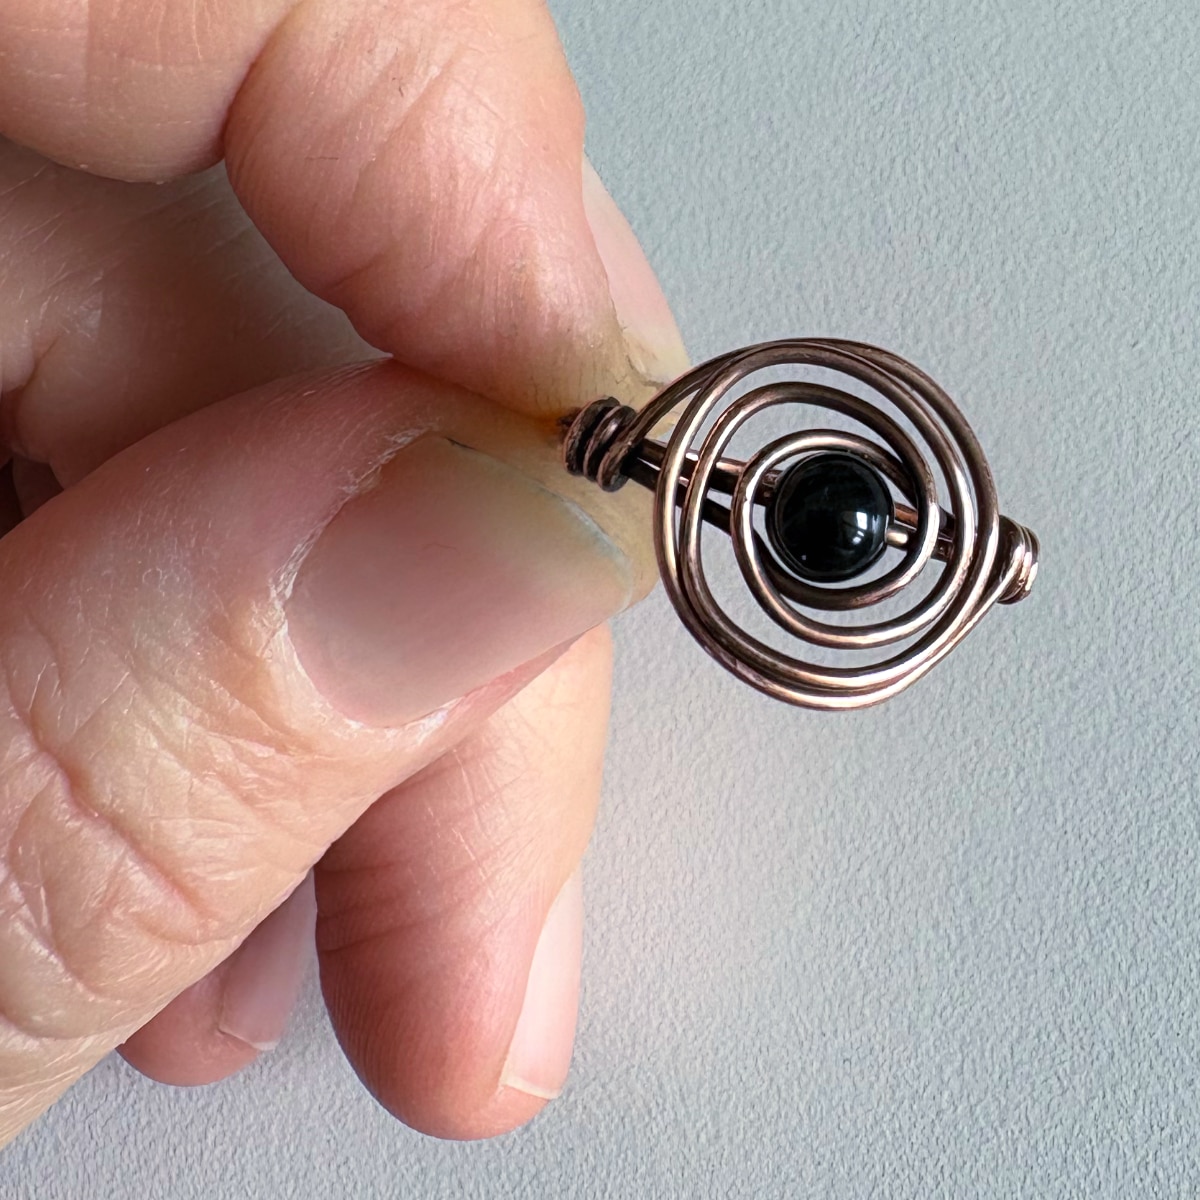
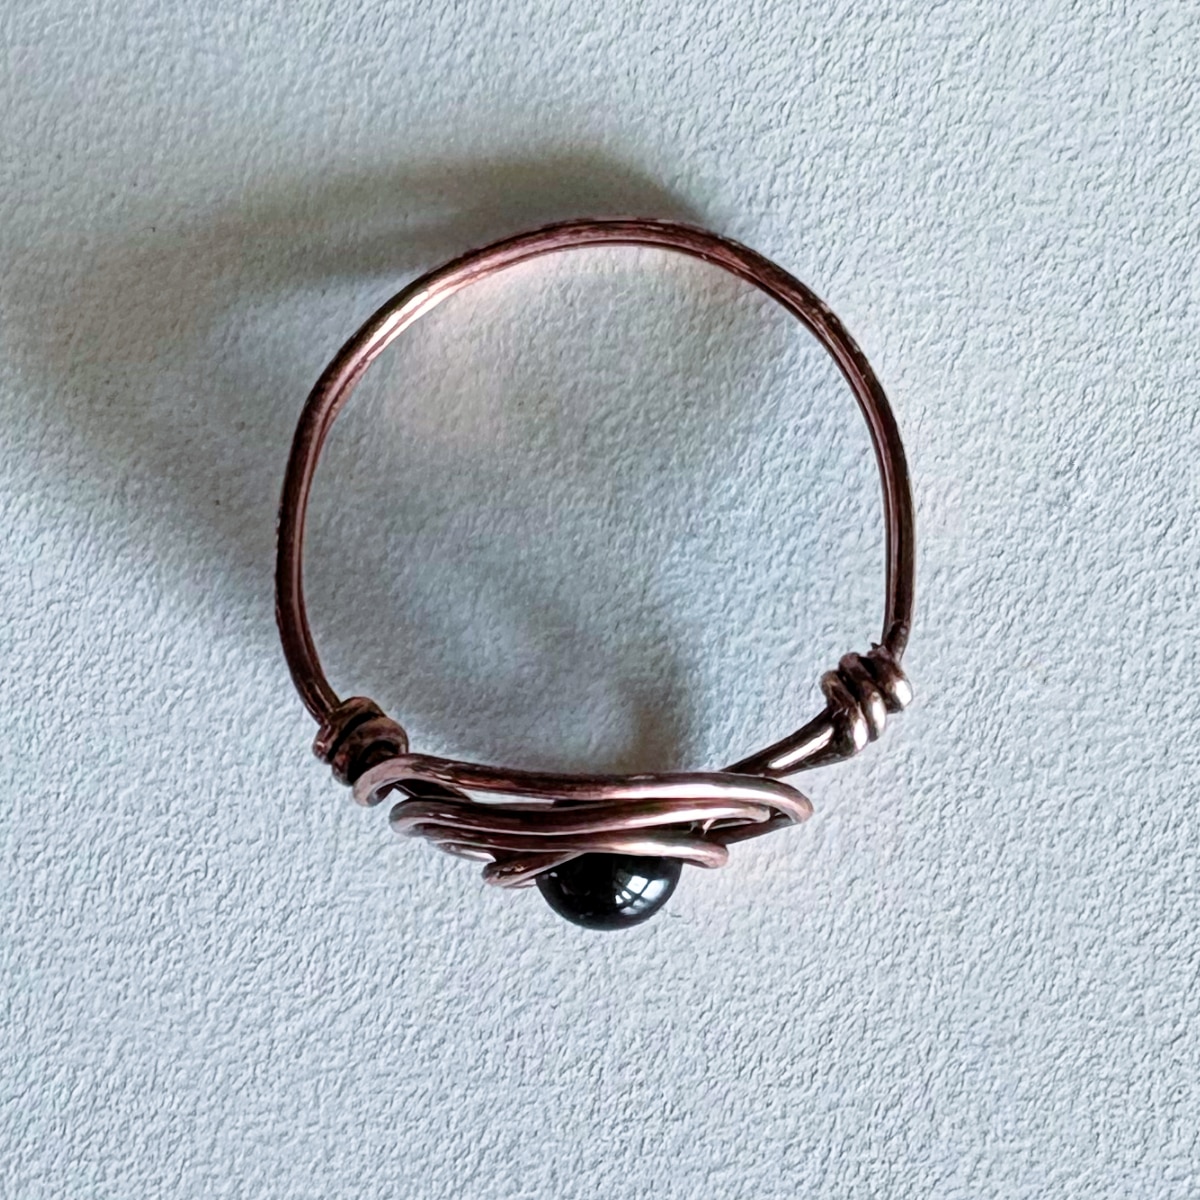
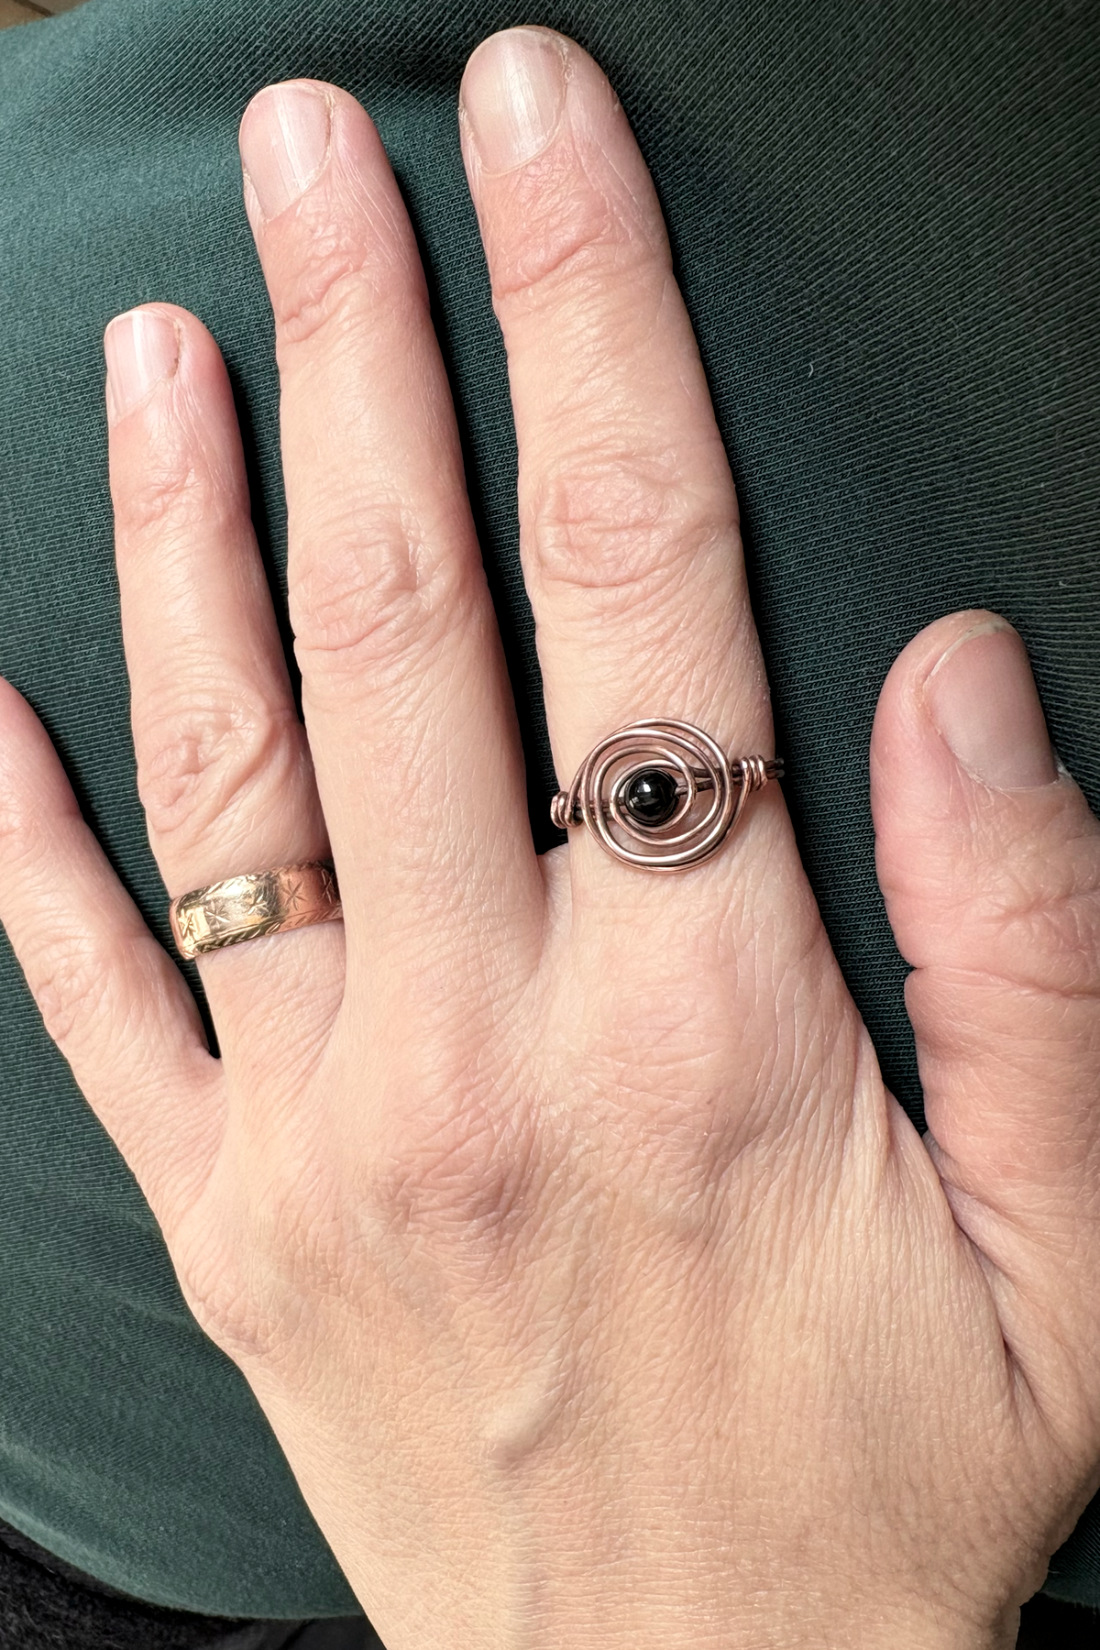
I made this ring for myself from 22 gauge (0.8 mm) copper wire—just 23 cm of it, wrapped around a small 4 mm black obsidian stone. It started as a simple piece of wire, but after shaping, polishing, and a bit of patience, it turned into something I really love.
To deepen the character, I patinated it with ammonia fumes, bringing out a darker, aged look. Then, another polish and a coat of Renaissance wax to protect the finish. Now, the warm, earthy copper contrasts beautifully against my skin, and the black obsidian catches the light just enough to feel alive.
It’s a small thing, but there’s something special about wearing something made by hand—especially my own.
As a relatively new creative endeavour to me, I decided to share my jewelry making journey starting today, at the exact moment I am now. Which is a bit of a fixation on making small simple flowers from wire. I love them – simple shapes, beautiful hammered elements for making earrings (currently) and bracelets (maybe soon).
On jewelry making
I have a bit of an overwhelming problem when reading and watching all the tutorials and books on wire jewelry topics lately. I want to try them all. I want to make everything. And time is not enough. Time is never enough. I prefer working with wire, never have been enchanted by beads. Until now. Adding them can make a design much more interesting. Also, it turned out that I love natural gemstones – they’re not only beautiful but actually metaphorically magical. Looking closely at them you can sometimes differentiate structure of the crystals, shapes like clouds. Enough rambling, on to the flowers.
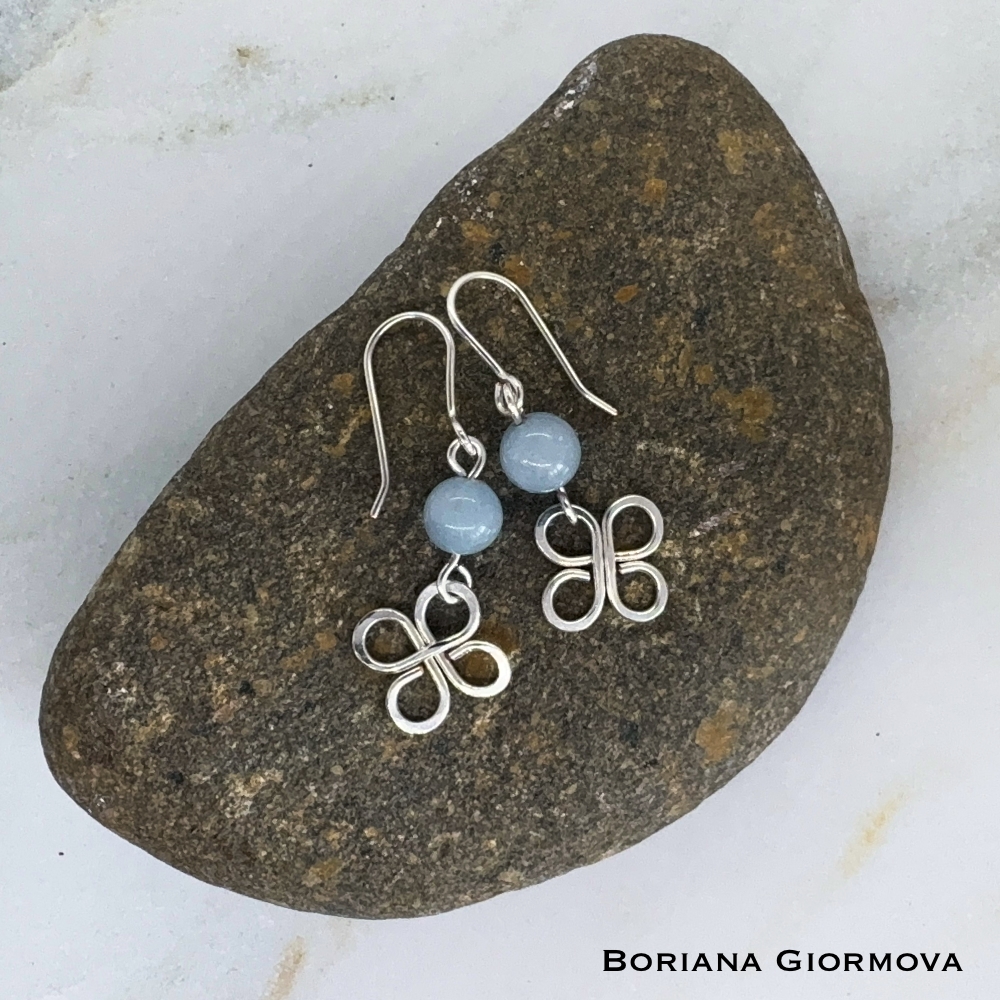
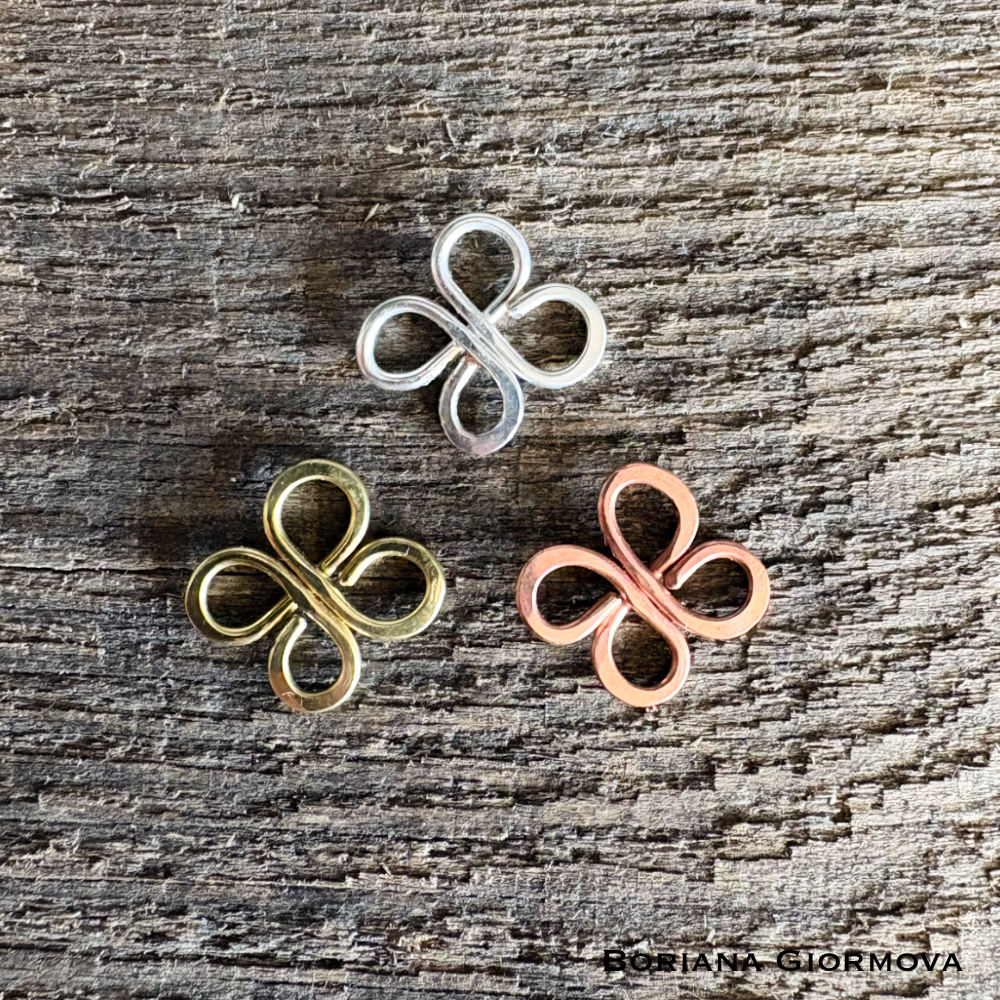
Simple wire flowers, type 1. Made of silver plated copper wire, brass wire and pure copperWire flowers, type 2 – Celtic style. Made after the fantastic tutorial at Regalia by Reiney
Jewelry with these flowers
I’ve made some earrings with the flowers featuring different stones. Like these:
Long copper earrings with natural opal stonesDainty silver plated copper earrings with aquamarine stonesLong silver plated copper earrings with aquamarine stonesCeltic flower earrings with aquamarine stones
Thanks for joining me on my journey. Until next time!
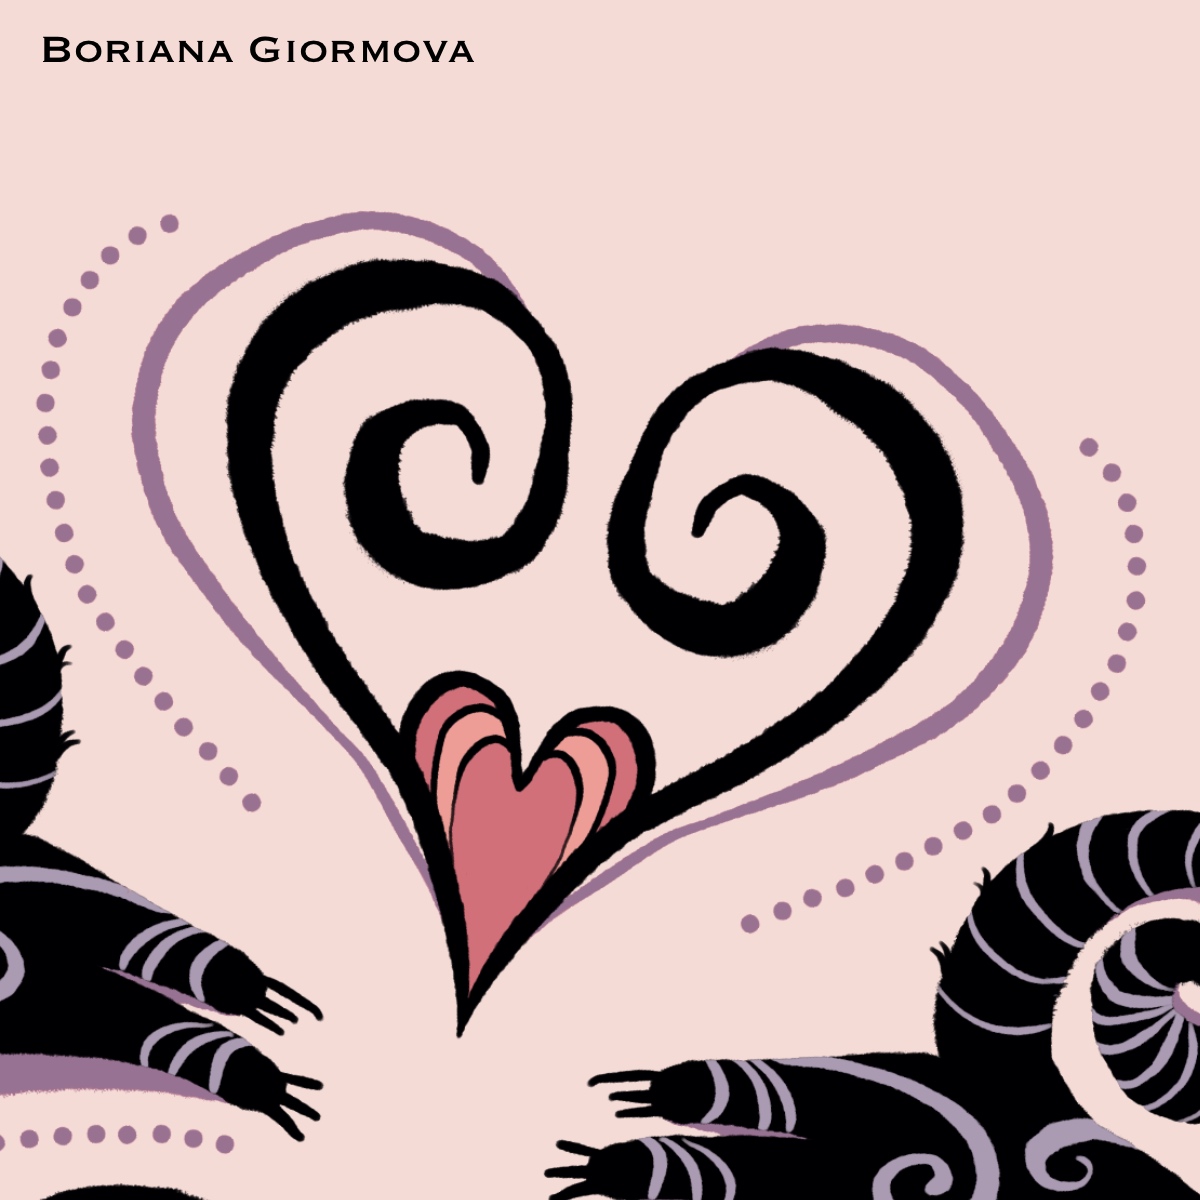
I had so much fun creating this illustration! It features four black cats mid-leap, arranged in an ellipse, decorated with delicate ornamental swirls and surrounded by little hearts. I wanted to capture a sense of movement, mystery, and playfulness while using a dreamy color palette of pinks, purples, and deep black. It’s a little bit magical, a little bit cute, and definitely made with love for fellow cat lovers.
Art print of the kitties – available at my Redbubble store
The cats are a bit weird, with puzzled look in their glowing eyes and swirls on their cute little bodies – just the way I like them.
See some details:
Close-up on Miss Kitty herselfOne of the swirly hearts
Drew the artwork in Procreate. I totally adore this app’s symmetry feature. It’s always such an immense fun playing with it. This time I started only with the idea for the loosely drawn jumping feline creature. The idea for the rest appeared while drawing it.
If you like this design, you can find it on Redbubble, TeePublic, and Threadless as prints, stickers, apparel, and more! Whether you want a cozy hoodie, a cute tote bag, or some fun home decor, there’s something for everyone. Your support means the world to me, and I hope this design brings a little joy to your day!