Today, I want to share a small but incredibly satisfying project that transformed how I organize my tools: a 3D printed mini pliers divider for a cardboard box. It was fairly easy to do this only with my basic Blender skills. Here’s how I turned a humble cardboard box into a nicely organized tool storage solution.


The Box
The starting point of this project was the cardboard box from my AirPods. It was sturdy, clean, white, the perfect size for my set of mini pliers, and had been lying around unused.
Before diving into the design, I measured the internal dimensions of the box. Accurate measurements were crucial for ensuring the divider fits perfectly. It had to be tight so as not to move when I pick up and put the pliers in their places.
Divider Design in Blender
With the measurements in hand, I opened Blender and started designing the divider. Here’s a simple way to approach the design:
- Created a base. Started with a rectangular base matching the internal dimensions of my box. Made the base’s dimensions 95mm x 95 mm x 2 mm.
- Added the dividers. Designed vertical walls that would act as the slots for my five pairs of pliers. I spaced these out evenly, considering the width of my pliers. (Umm… I have to confess walls are almost evenly spaced – I was eager to see it finished.)
- Checked the height. Ensured the height of the dividers is slightly less than the height of the box so they fit snugly without protruding.
- Cut holes on the base with boolean modifiers because I wanted to use as little material as possible.
Printed the Divider
After completing the design, I exported the file as an STL and loaded it into my 3D printer software. I printed the divider on my Anycubic Kobra 2 Pro using clear PLA filament, which is both sturdy and easy to print with. And a what a wonder! It printed well from the first time. (Unlike most of my other 3d printing projects.)
Fit the Divider into the Box
Once the print was done, I carefully removed it from the printer, cleaned the brim and placed it into the cardboard box. To my delight, it fit perfectly! The measurements and design paid off, and the divider sat snugly inside the box.
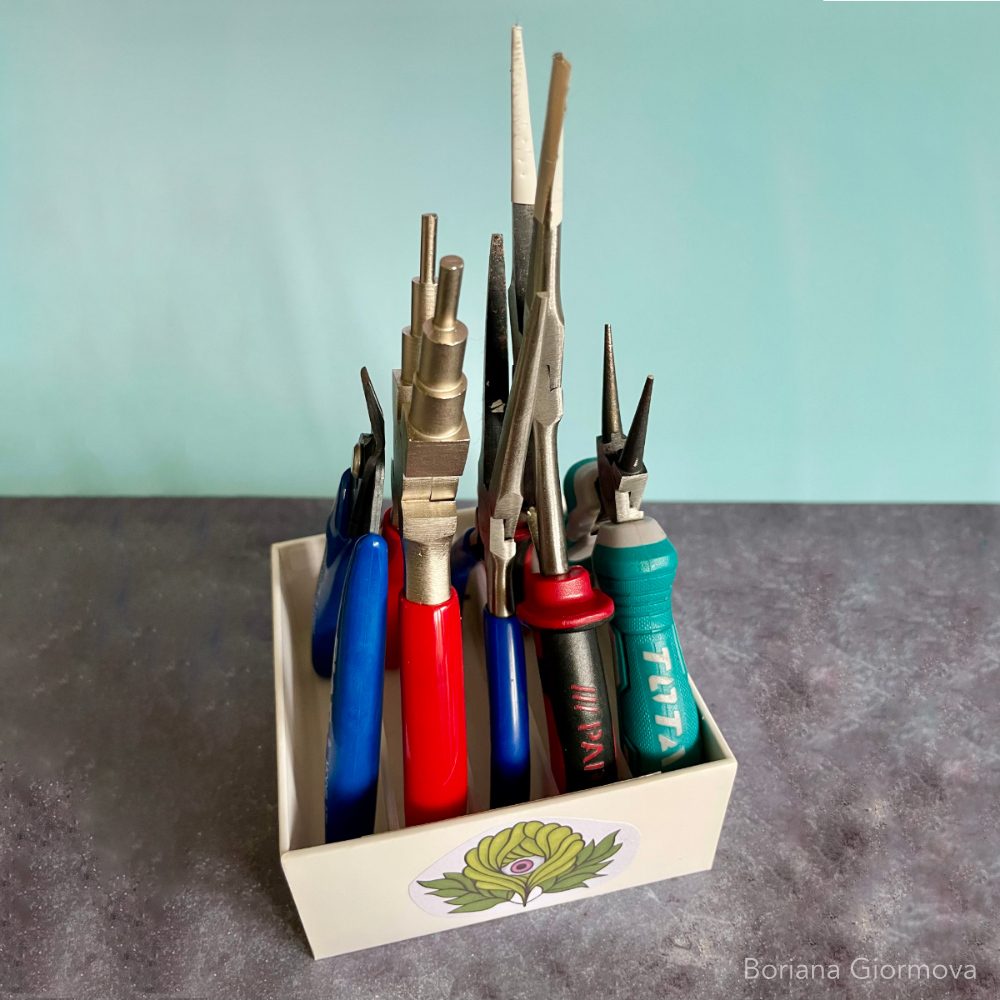
Placed a Sticker
Printed a sticker with one of my latest designs and slapped it on the logo to hide it. The box had to be personalized to the bone.
Put My Lovely Pliers in Their New Home
With the divider in place, I organized my pliers into the slots. They fit beautifully, each in their own compartment. No more rummaging around to find the right tool – everything is now in order and easily accessible.
Last Words (Not my last, just for the post. Oh, well…)
This simple project was immensely satisfying. Not only did I repurpose an old box, but I also used my 3D printing skills to create something incredibly functional. Now, my pliers are always in order, and I have a neat, organized tool storage solution.
If you’re looking for a practical and rewarding DIY project, I highly recommend giving this one a try.
Also, you can download my STL file for free here. In case you have the same box. Lay it flat in your slicing software as it will be used. Shapes are simple and no supports are needed. Just print it with brim so it sticks well to the printer plate. Have a nice time creating!
Lastly, if there is something not quite clear, you can always ask me in a comment. 🙂
